Chatbot Custom Domain Setup Guide
Once you've created a chatbot using Tiny Talk, a URL is generated for you automatically based on the ID of your chatbot so that you can embed and share your chatbot. For instance, your chatbot ID might be something like eddbb1aa-a835-45ad-87c8-043dd8f8e00f, and your chatbot would be accessible at https://dashboard.tinytalk.ai/bots/eddbb1aa-a835-45ad-87c8-043dd8f8e00f
However, you may want to replace the Tiny Talk domain with your custom domain for a more personalized and professional look.
Quick Overview
- Purchase a custom domain from a third-party provider.
- Decide which subdomain to use: e.g.
chat.example.com - Enter your subdomain and copy the
CNAMEandTXTrecords provided. - In your DNS provider add a CNAME record (subdomain →
proxy.tinytalk.ai) and a TXT record (the_verify-...name →tinytalk-verification=...). - Wait a bit, then click Verify in Tiny Talk Dashboard to complete integration.
Prerequisites
- You need a domain name. Make sure you’ve already purchased a domain (from GoDaddy, Namecheap, Google Domains, Squarespace, etc.). Tiny Talk doesn’t sell domains or replace your current domain provider – you must own one first.
- Use a subdomain, not the root. Tiny Talk only supports subdomains (e.g.
chat.example.com), not the naked domain (likeexample.com). In other words, pick or create a subdomain (often “www”, “bot”, “chat”, etc.) under your domain. For example, if your domain isexample.com, you might usechat.example.com. - Access to this feature. Certain plans come with 1 free custom domain. Others require purchasing custom domains add-on separately.
ℹ️ Info: Think of a subdomain as the first part of a web address before your domain (the “chat.” in
chat.example.com). It’s like adding an extension to your site’s name.
1. Enter Your Subdomain in Tiny Talk
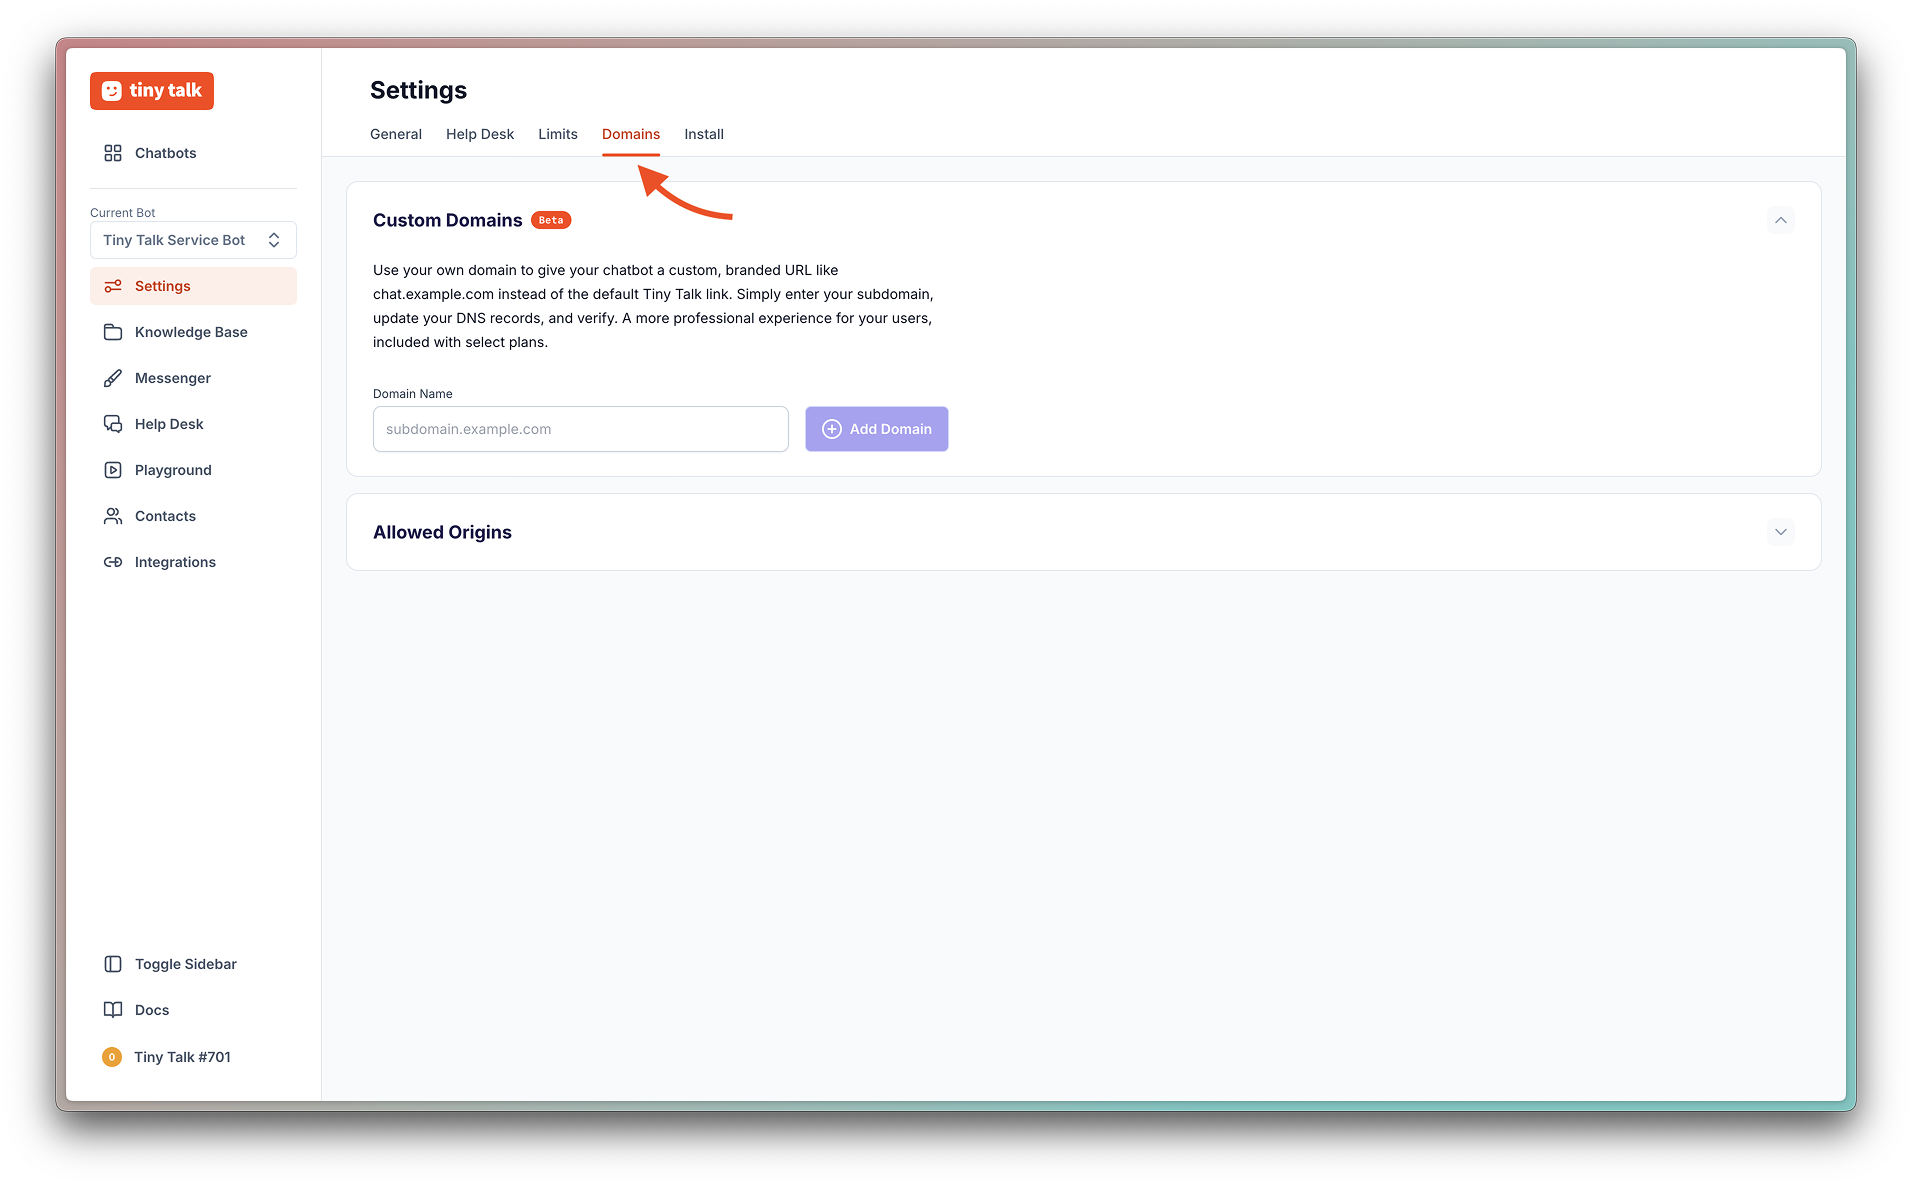
- Log into Tiny Talk’s Dashboard. Go to the Tiny Talk Dashboard and select the chatbot you want to setup custom domain for, find Domains tab under Settings page for your chatbot.

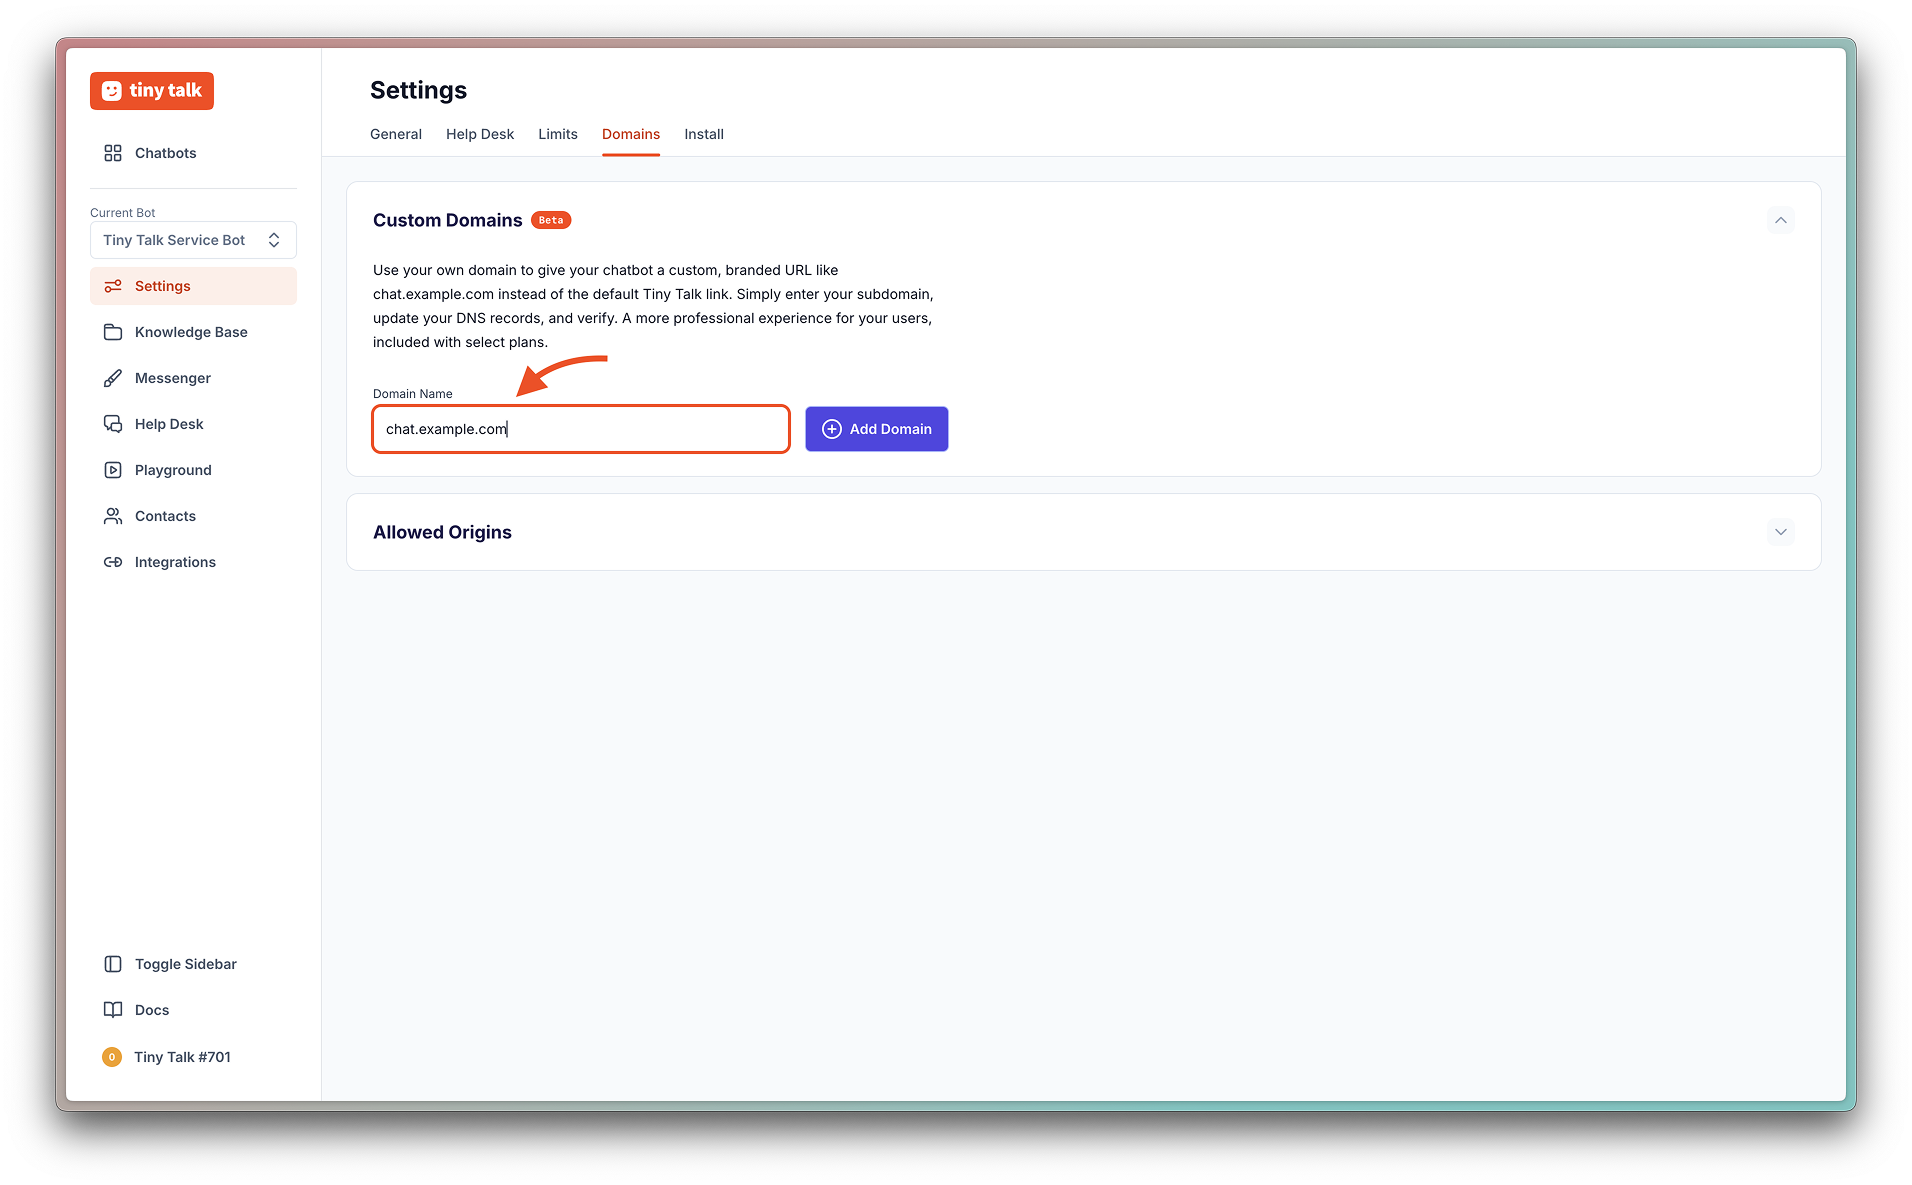
- Type in your desired subdomain. Enter the full subdomain you want (for example, chat.example.com) into Domains page. Remember: this must be a subdomain you own, as mentioned above.

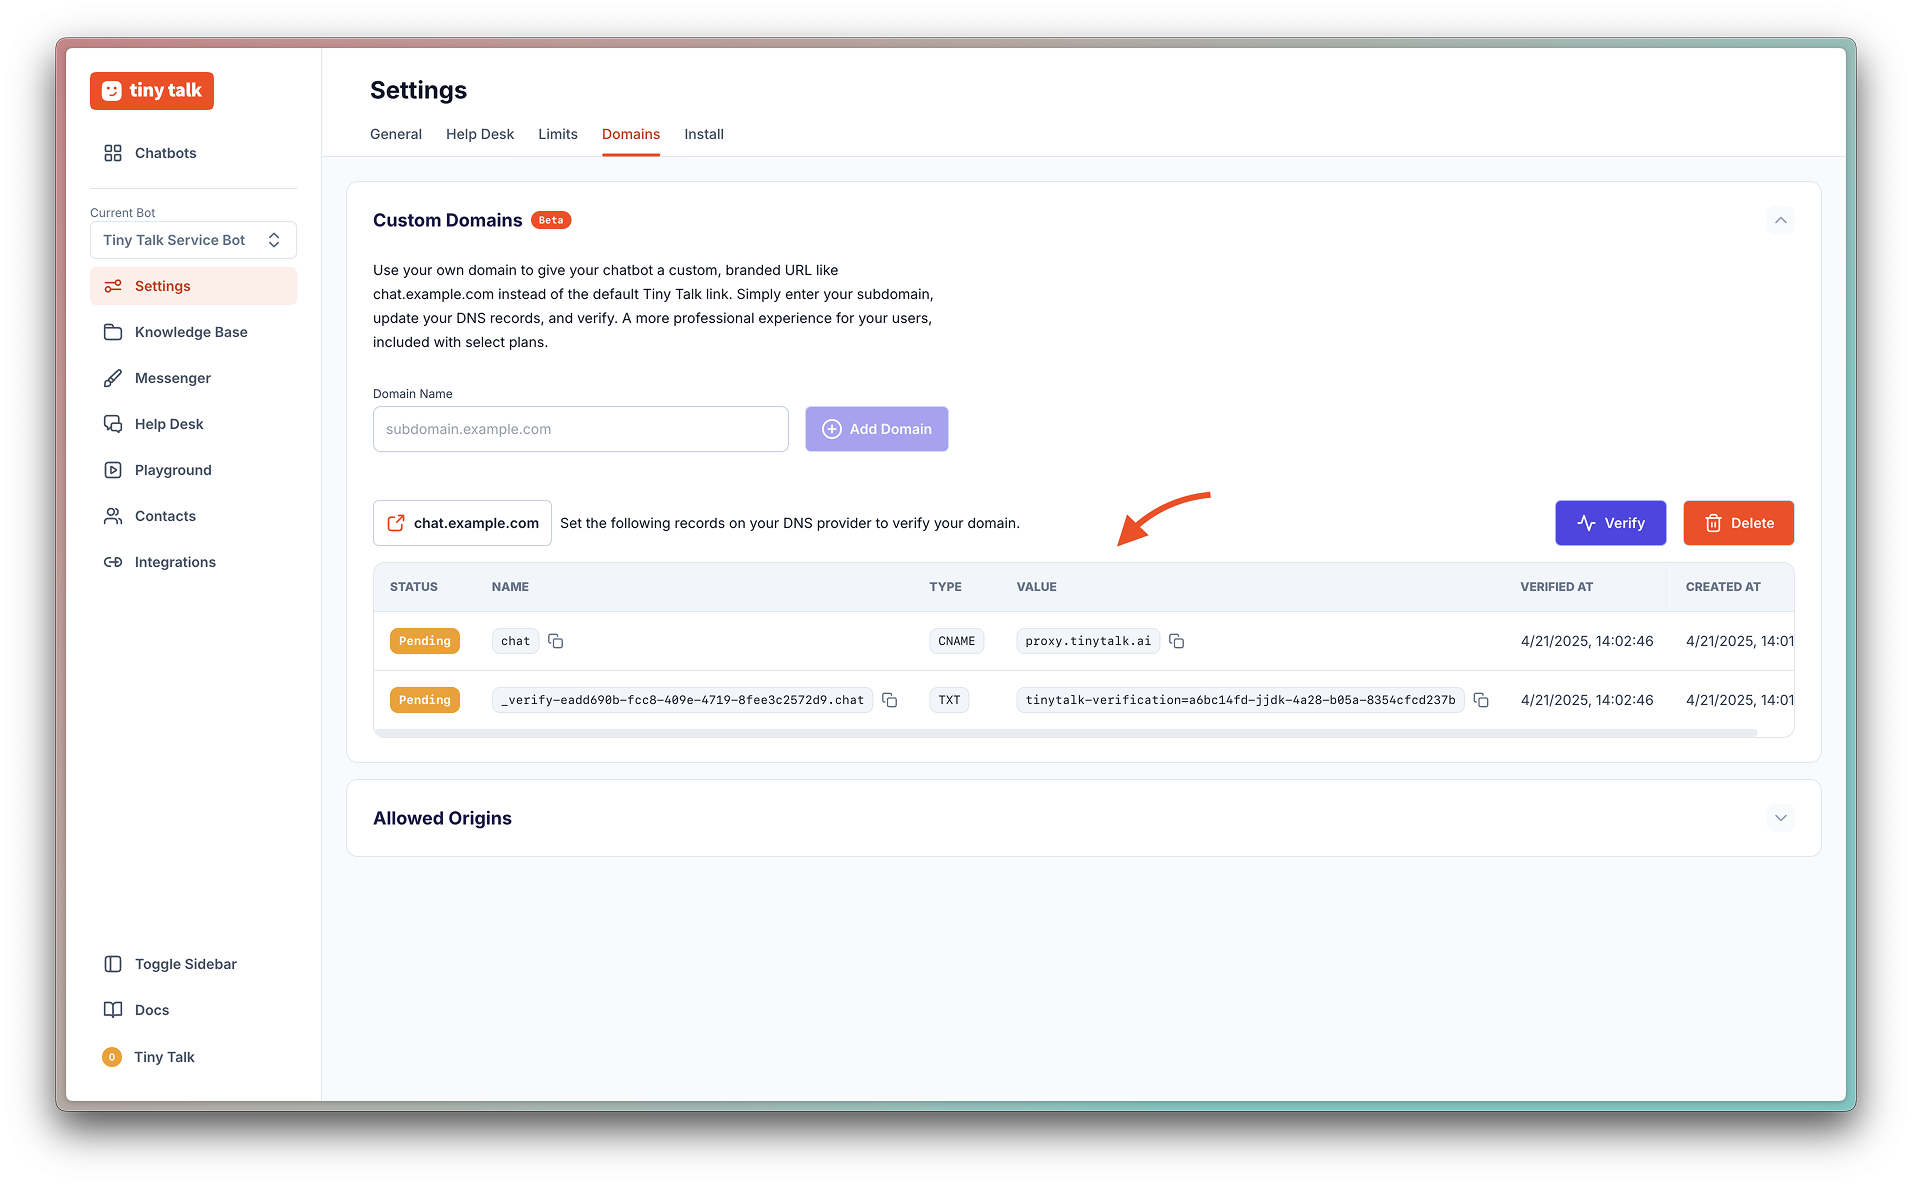
- Copy the DNS records Tiny Talk gives you. After you enter the subdomain, Tiny Talk will generate two DNS records for you:
- A CNAME record (for example, host
chatpointing toproxy.tinytalk.ai). - A TXT record for verification (typically something like host
_verify-xxxxwith valuetinytalk-verification=xxxx).
- A CNAME record (for example, host
2. Add DNS Records at Your Domain Provider
Now you need to tell your domain where chat.example.com should point and verify it. To do that, log in to the DNS settings for your domain (at GoDaddy, Namecheap, Cloudflare, Google Domains, Squarespace, or wherever you manage your domain). Then add the two records Tiny Talk gave you. We’ll cover the general idea and some popular providers below.
| Host/Name | Record Type | Value/Points to |
|---|---|---|
chat (your subdomain) | CNAME | proxy.tinytalk.ai |
_verify-xxxx (as given) | TXT | tinytalk-verification=xxxx |
(In the table above, replace chat and xxxx with the actual subdomain and codes Tiny Talk gave you.)
Common Steps (general)
- Sign in to your domain account. Go to the service where you bought your domain.
- Find DNS or Domain Management. Look for “Manage DNS”, “DNS settings”, or similar.
- Add a CNAME record. Choose to add a new record of type CNAME. For Host/Name, enter your subdomain part (e.g.
chat). For Value/Points to, enterproxy.tinytalk.ai. Save this record. - Add a TXT record. Add another new record of type TXT. For Host/Name, use the name Tiny Talk provided (it will look like
_verify-<something>). For Value, enter the code Tiny Talk provided (starting withtinytalk-verification=). Save it. - Save changes and wait. DNS changes usually take a few minutes to a couple of hours to propagate, so don’t panic if it doesn’t work immediately.
GoDaddy
- Where to click: Log in, go to My Products → Domains → find your domain and click DNS or Manage DNS.
- Add records: Click Add (or Add New Record).
- For Type, select CNAME. Name = your subdomain (e.g.
chat). Value =proxy.tinytalk.ai. Save it. - Then click Add again for Type = TXT. Host = the
_verify-...name given by Tiny Talk. TXT Value = thetinytalk-verification=...string. Save.
- For Type, select CNAME. Name = your subdomain (e.g.
Namecheap
- Where to click: Log in and go to Domain List (left menu) → click Manage next to your domain. Then go to the Advanced DNS tab.
- Add records: In the Host Records section, click Add New Record.
- Choose CNAME Record. Host = your subdomain (e.g.
chat). Value/Target =proxy.tinytalk.ai. (Namecheap auto-adds your domain to the host, so just putchatnotchat.example.com.) Click Save. - Click Add New Record again for Type = TXT. Host = the
_verify-...name from Tiny Talk. Value =tinytalk-verification=...(the code Tiny Talk provided). Save it. - TTL: Use a low TTL value to quickly propagate changes in case you make a mistake.
- Choose CNAME Record. Host = your subdomain (e.g.
Namecheap’s documentation shows these steps with screenshots. Basically, just pick CNAME and TXT from the dropdown, fill in Host and Value, and save.
Cloudflare
- Where to click: Log in to Cloudflare, select your domain, then go to the DNS tab.
- Add records:
- Click Add record. Type = CNAME. Name = your subdomain (e.g.
chat). Target =proxy.tinytalk.ai. Click Save. - Add another record: Type = TXT. Name = the
_verify-...code. Content =tinytalk-verification=.... Save it. - TTL: Use a low TTL value to quickly propagate changes in case you make a mistake.
- Click Add record. Type = CNAME. Name = your subdomain (e.g.
⚠️ Important: Make sure the CNAME record is set to DNS only (grey cloud), not proxied/“orange cloud.” (Proxied CNAME can block automated SSL provisioning that Tiny Talk handles for you.)
Google Domains
- Where to click: Go to Google Domains. Click Manage for your domain, then DNS on the left.
- Add records: Under Custom records, click Add.
- CNAME: For Host, put your subdomain (e.g.
chat). Type = CNAME. TTL = keep default (3600). Data/Value =proxy.tinytalk.ai. Save. - TXT: Click Add again. Host =
_verify-...from Tiny Talk. Type = TXT. Data =tinytalk-verification=.... Save. - TTL: Use a low TTL value to quickly propagate changes in case you make a mistake.
- CNAME: For Host, put your subdomain (e.g.
3. Verify in Tiny Talk
Once you’ve added both records:
- Go back to Tiny Talk’s dashboard.
- Click the “Verify” button. Tiny Talk will check the DNS records. It should show your subdomain as verified if everything is correct.
If it doesn’t verify right away, wait a bit longer and try again. DNS changes can take a short while to propagate. Use DNS tools like https://dnschecker.org to check the propagation of CNAME record.

Congratulations, your chatbot should now be accessible at https://chat.example.com/bots/{bot-id} (or whatever subdomain you chose)!
SSL Certificate (HTTPS) – Handled for You
Tiny Talk automatically takes care of HTTPS for you. Once your CNAME and TXT is set up, Tiny Talk will provision an SSL certificate (via Let’s Encrypt) for your subdomain so the whole subdomain connection will be encrypted and secured. You don’t need to do anything; Tiny Talk will auto-renew it.
⚠️ Cloudflare note: If you’re using Cloudflare, remember to set your CNAME to DNS-only (grey cloud). A proxied (orange-cloud) CNAME might prevent the SSL certificate from issuing automatically.
4. Removing DNS Records Later
If you ever delete your chatbot or stop using that subdomain, go back to your DNS provider and delete those CNAME and TXT records. It is important to keep a clean DNS record table to apply best security practices.
You did it! 🎉 Now your Tiny Talk chatbot will live under your own trusted URL. Enjoy the branded experience!
