Getting Started with AI Chatbots!
A Practical Guide to Custom Chatbots
Unlock the Power of Conversational AI for Your Business
Are you looking to enhance your customer interactions, automate support, or streamline your business processes? AI chatbots can be a game-changer. These intelligent virtual assistants can simulate human-like conversations, providing real-time assistance to your customers and prospects.
In this practical guide, we’ll explore the world of AI chatbots and introduce you to Tiny Talk, a powerful chatbot platform that can help you build sophisticated and engaging chatbot experiences. Let’s dive in!
What Are AI Chatbots?
AI chatbots are software programs designed to interact with users in a conversational manner. Powered by artificial intelligence and natural language processing (NLP) technologies, they can understand user inputs, interpret their intent, and provide relevant responses. AI chatbots can be used for a wide range of applications, including customer support, lead generation, and personalized recommendations.
Introducing Tiny Talk: A Powerful Chatbot Platform
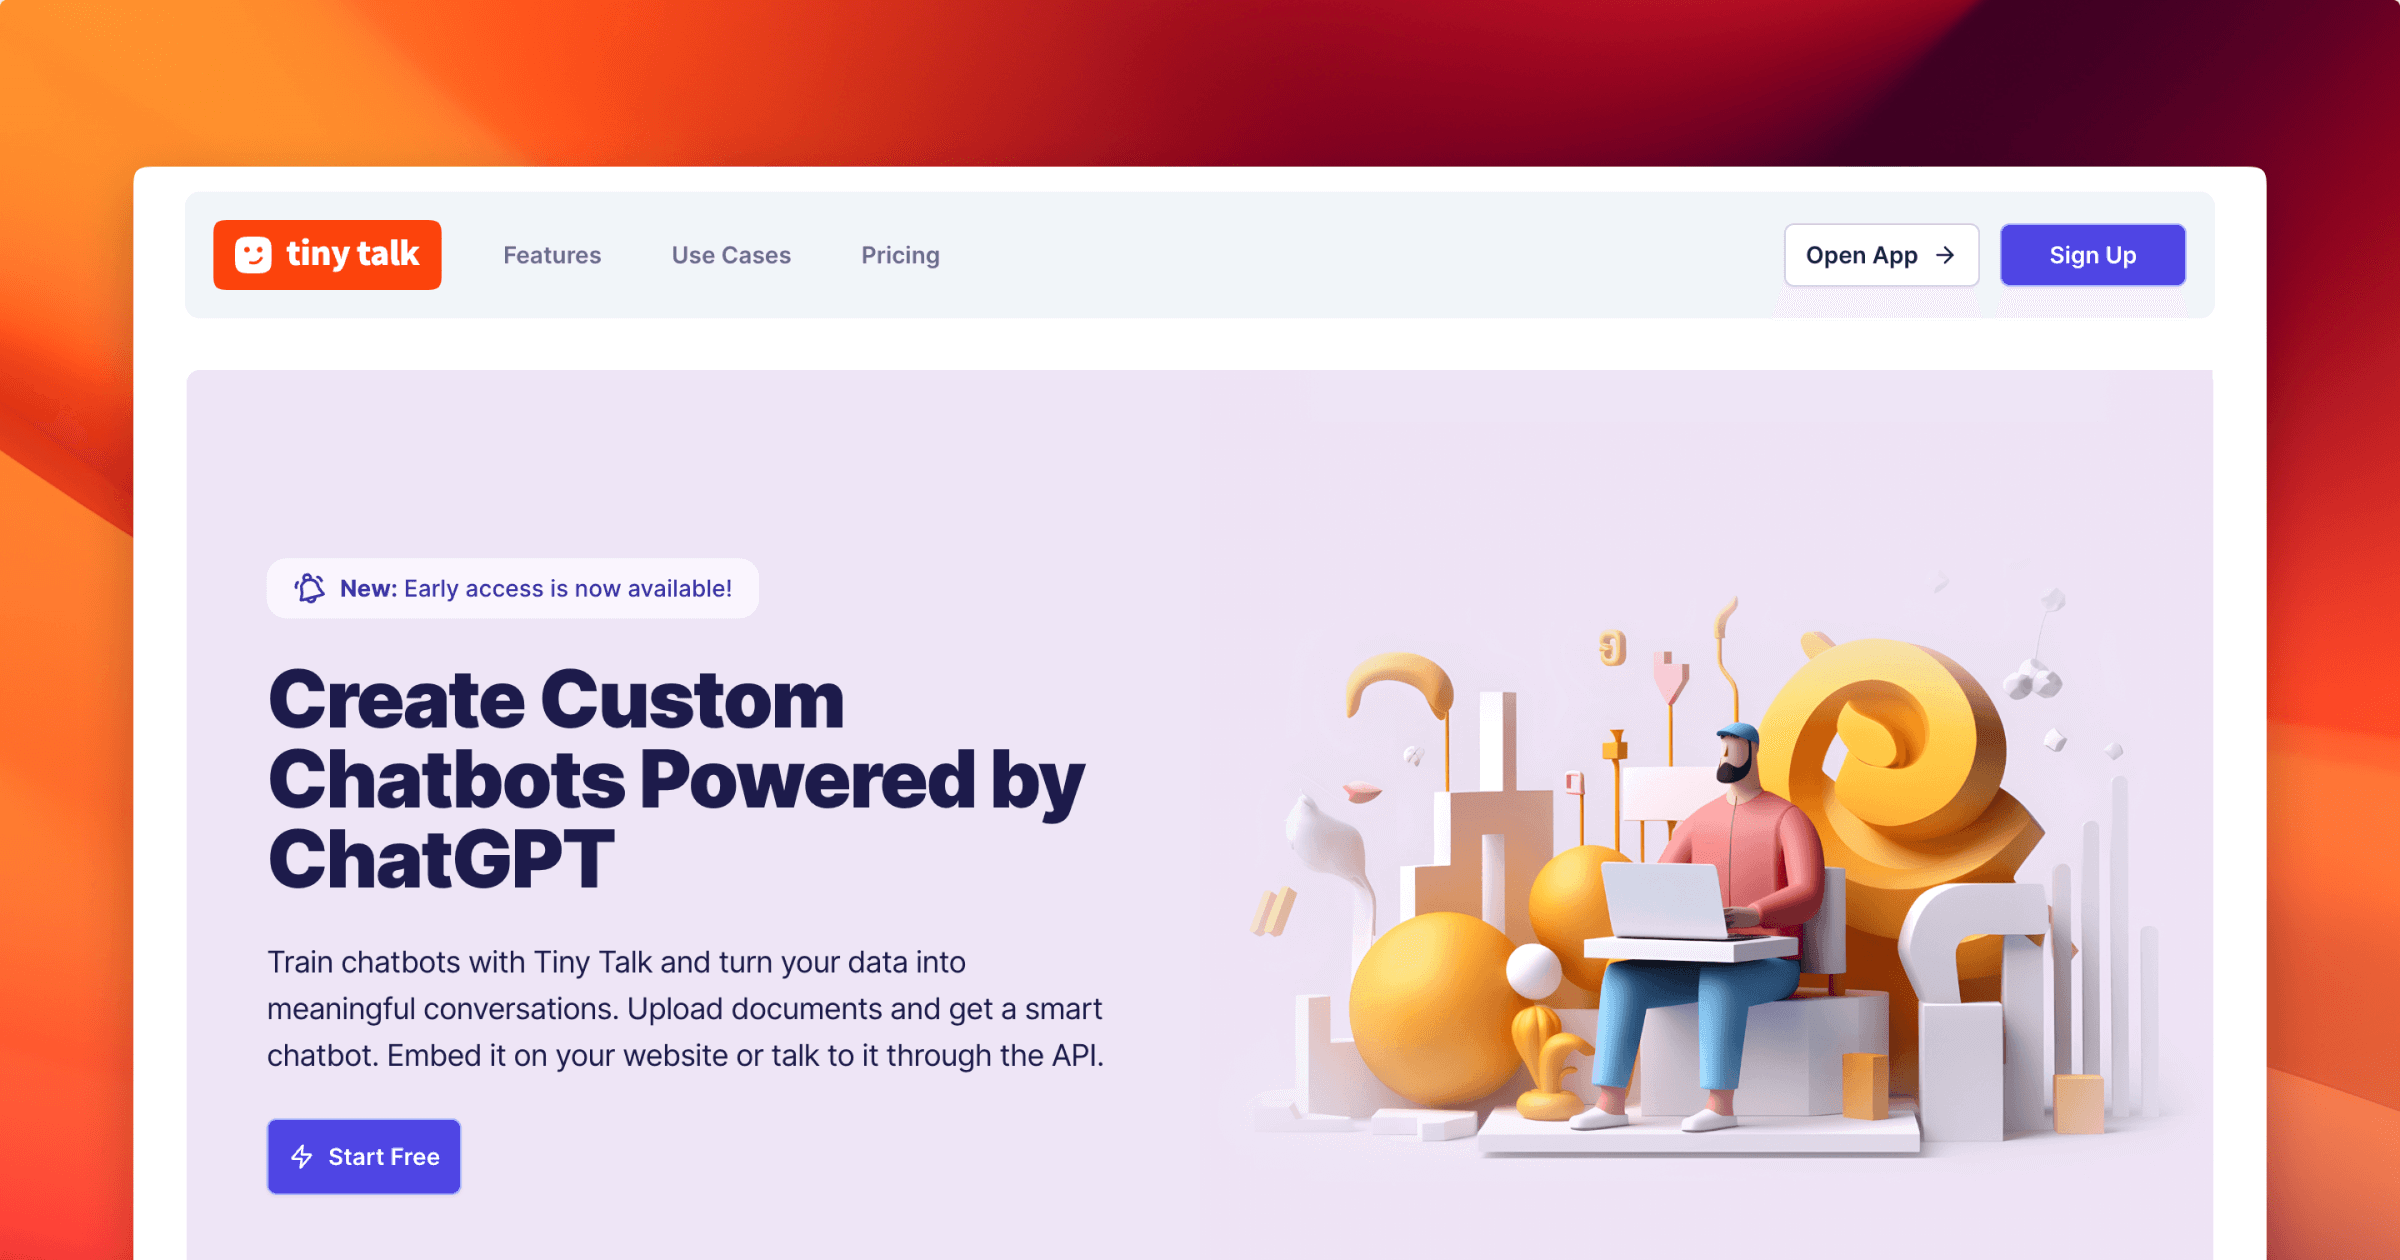
At the forefront of AI chatbot platforms is Tiny Talk. With its advanced capabilities and intuitive interface, Tiny Talk empowers businesses to create highly customizable chatbot experiences. Powered by ChatGPT, an industry-leading language model, Tiny Talk combines state-of-the-art AI technology with user-friendly tools to deliver exceptional conversational experiences.
Why Choose Tiny Talk?
Flexibility and Customization: Tiny Talk offers a range of customization options, allowing you to personalize your chatbot’s appearance, behavior, and responses. Tailor the chatbot to align with your brand’s voice and tone.
Document Training: With Tiny Talk, you can train your chatbot using your own documents. Simply upload PDF files or provide links to relevant content, and Tiny Talk will extract valuable information to enhance the chatbot’s knowledge and responses.
Seamless Integration: Whether you want to embed the chatbot on your website or integrate it with your platform, Tiny Talk makes it easy. Seamlessly connect with platforms like WhatsApp, Slack (soon), even deploy the chatbot as a widget on your website or use it through the API to integrate with your applications.
Getting Started with Tiny Talk: Step-by-Step Guide
Let’s walk through the process of getting started with Tiny Talk and building your AI chatbot:
Step 1: Signing Up and Creating an Account
To begin, visit the Tiny Talk Dashboard and sign up for an account. Fill in the required details, and you’ll be granted access to the Tiny Talk platform.
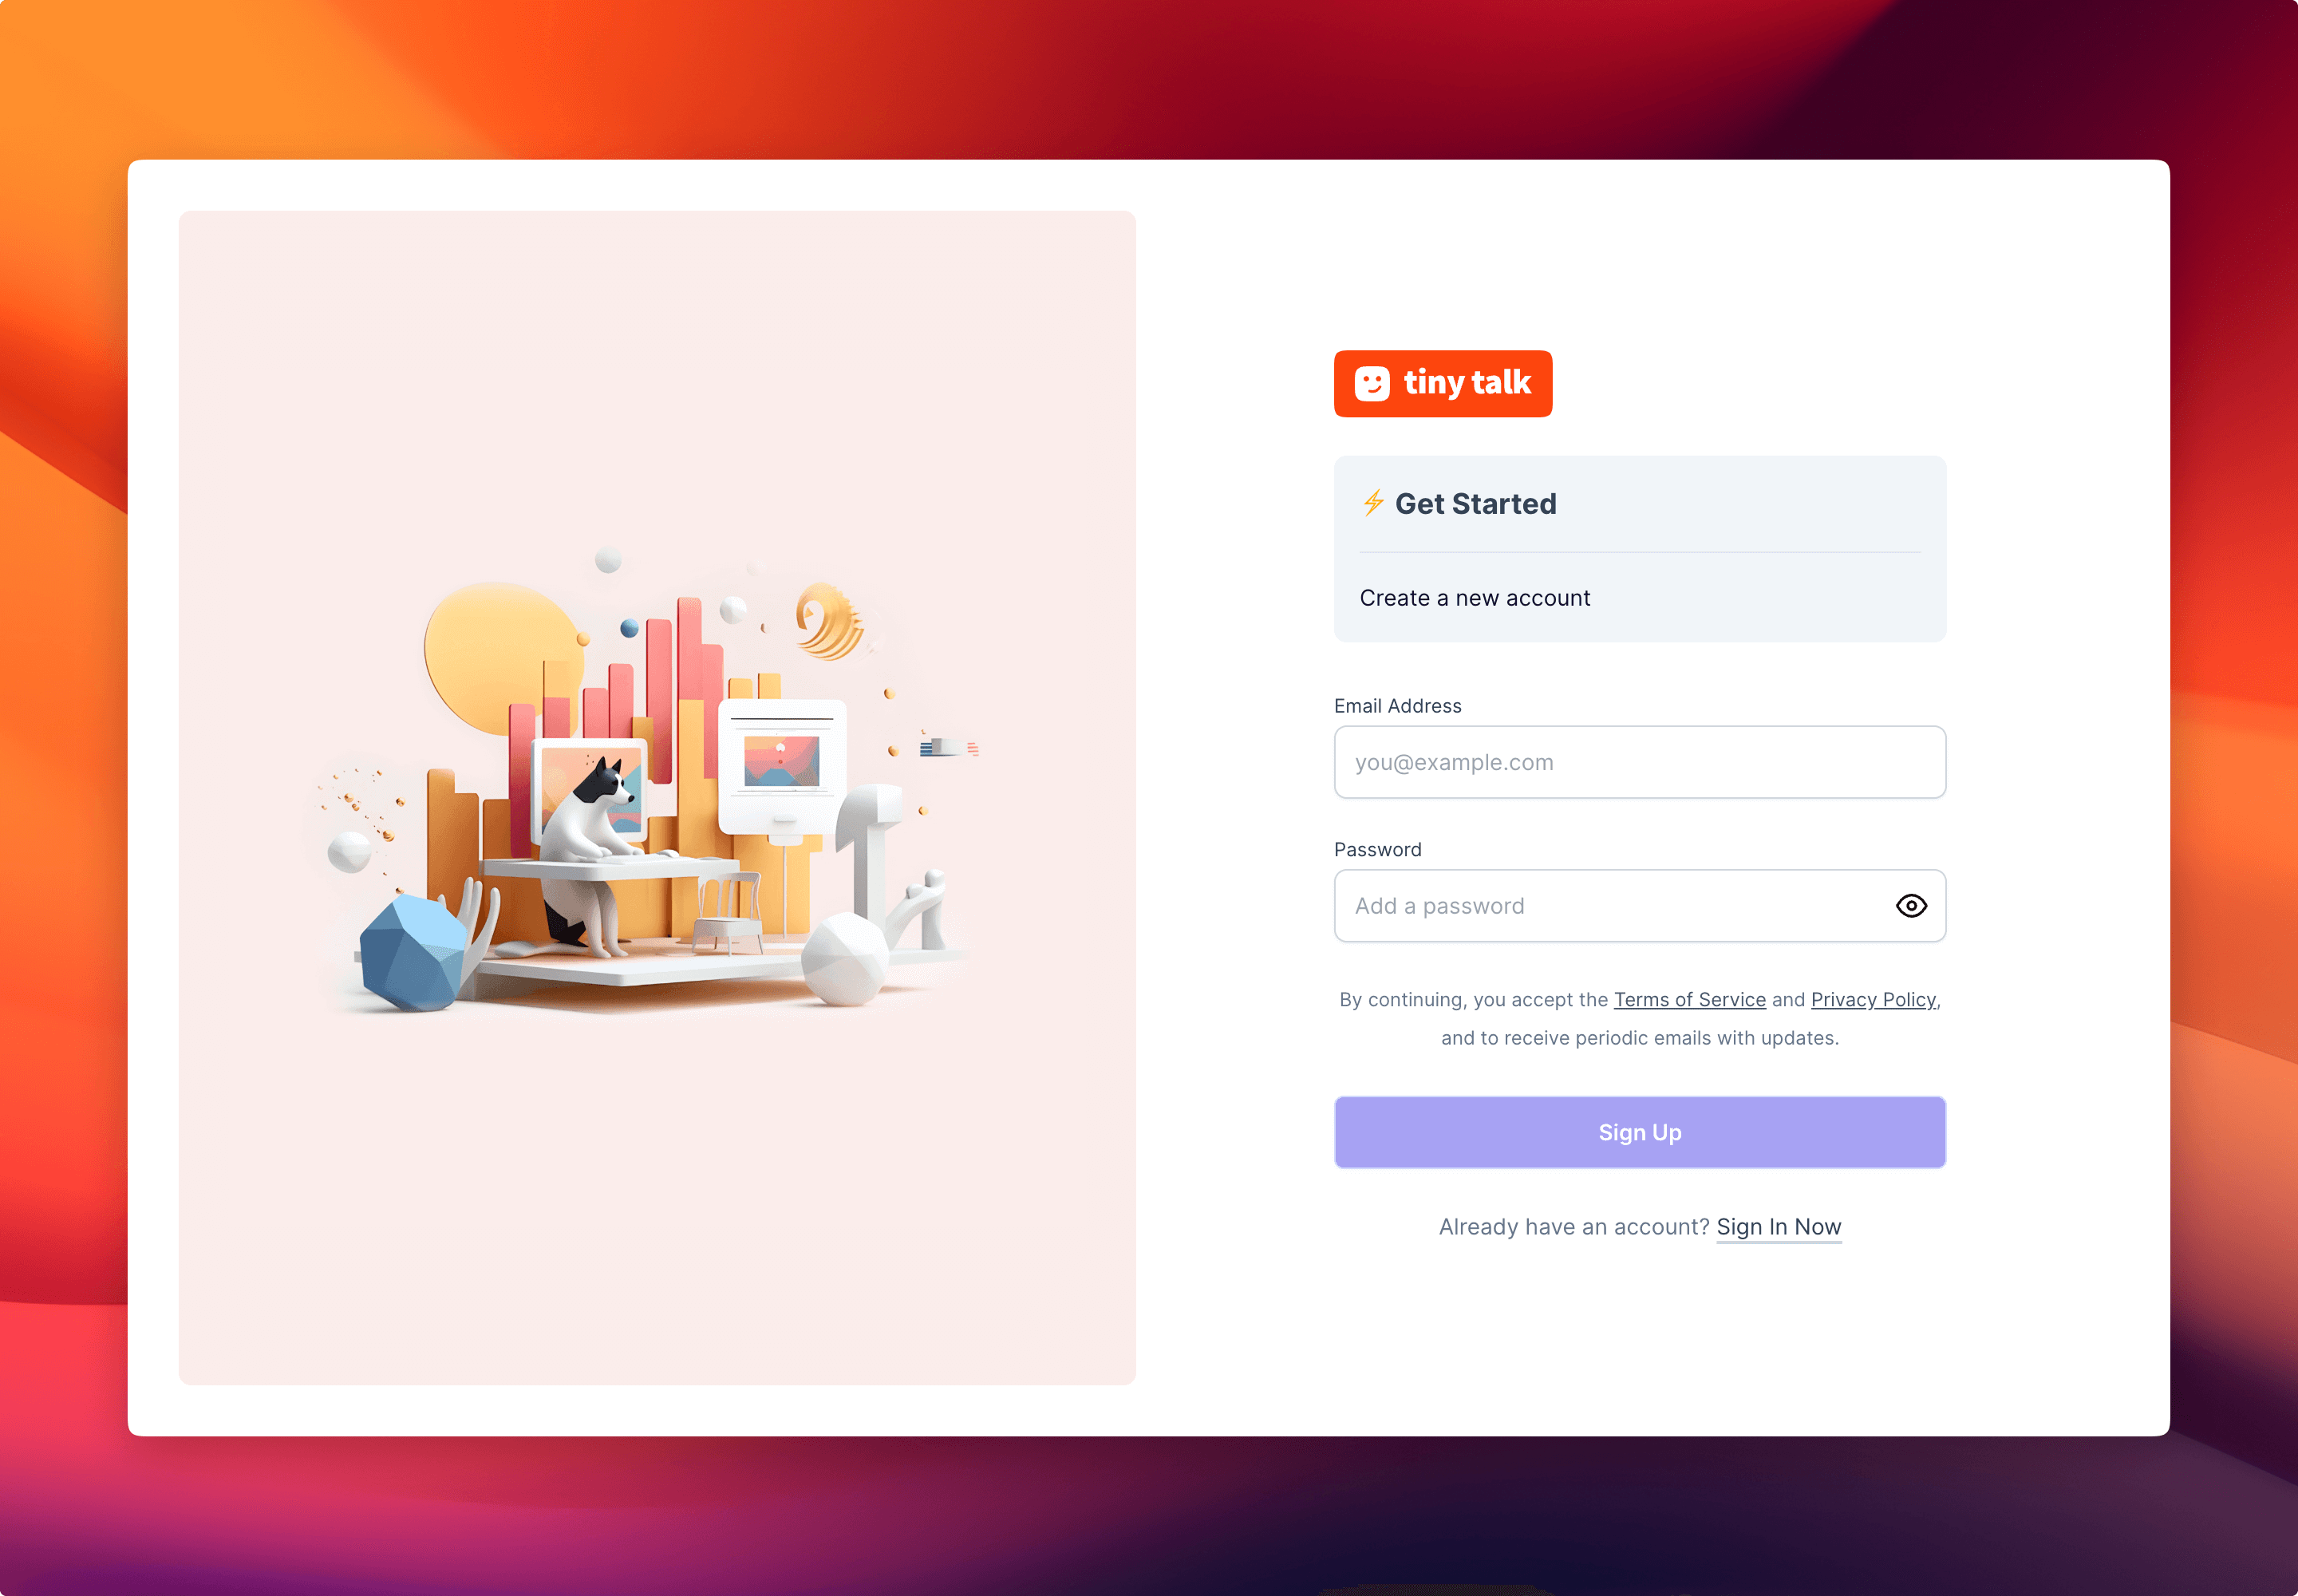 Sign up to create a new account
Step 2: Setting Up Your Chatbot and Personalizing It
Once you’ve created your account, it’s time to create and set up your chatbot. Choose a unique name and tagline that best represents your chatbot’s purpose and personality. You can also customize the appearance by selecting colors and even adding an avatar.
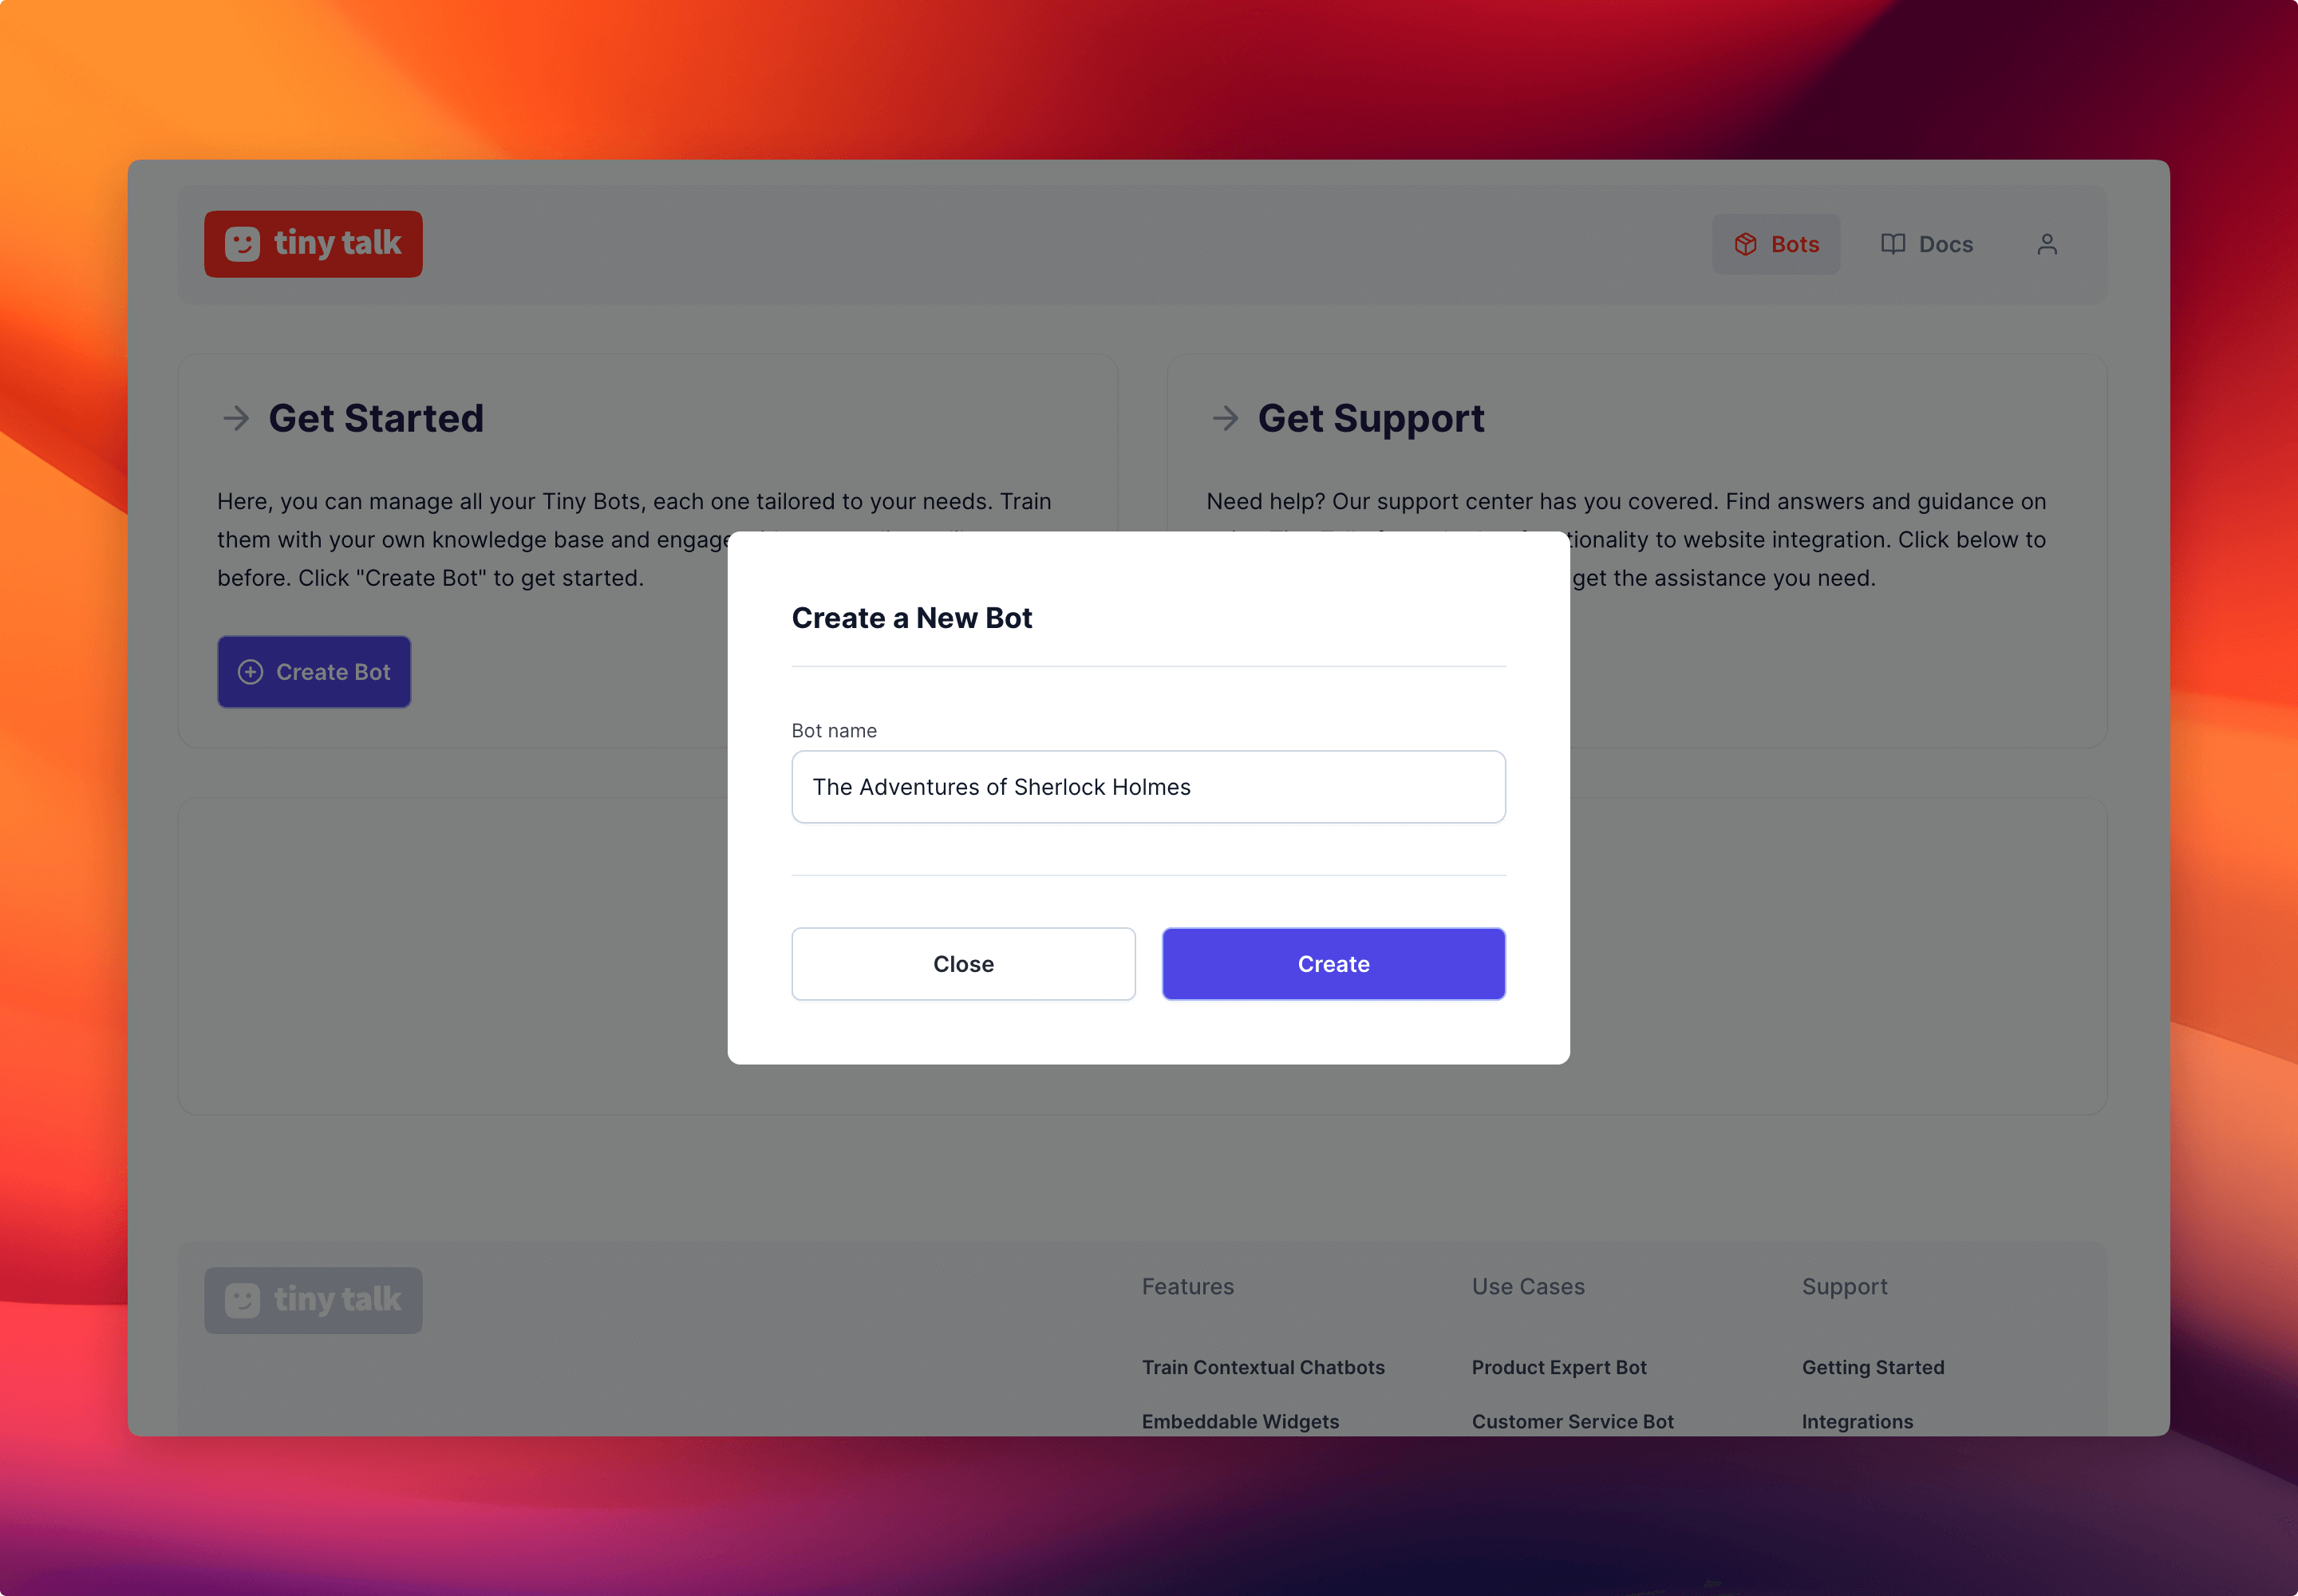 Once you login, you can create a new bot and give it a name
Next, add your OpenAI API key. Yes you will need to first Get an OpenAI API key. Tiny Talk stores all keys in an encrypted form at rest and never share with others, expose it in the browser or other client-side code.
When it comes to API key settings for each bot, you gain a high level of control and visibility over the usage of different keys. For example, you can assign a unique API key to Department A’s chatbot and do the same for Department B, granting them exclusive control over their respective usage and access permissions.
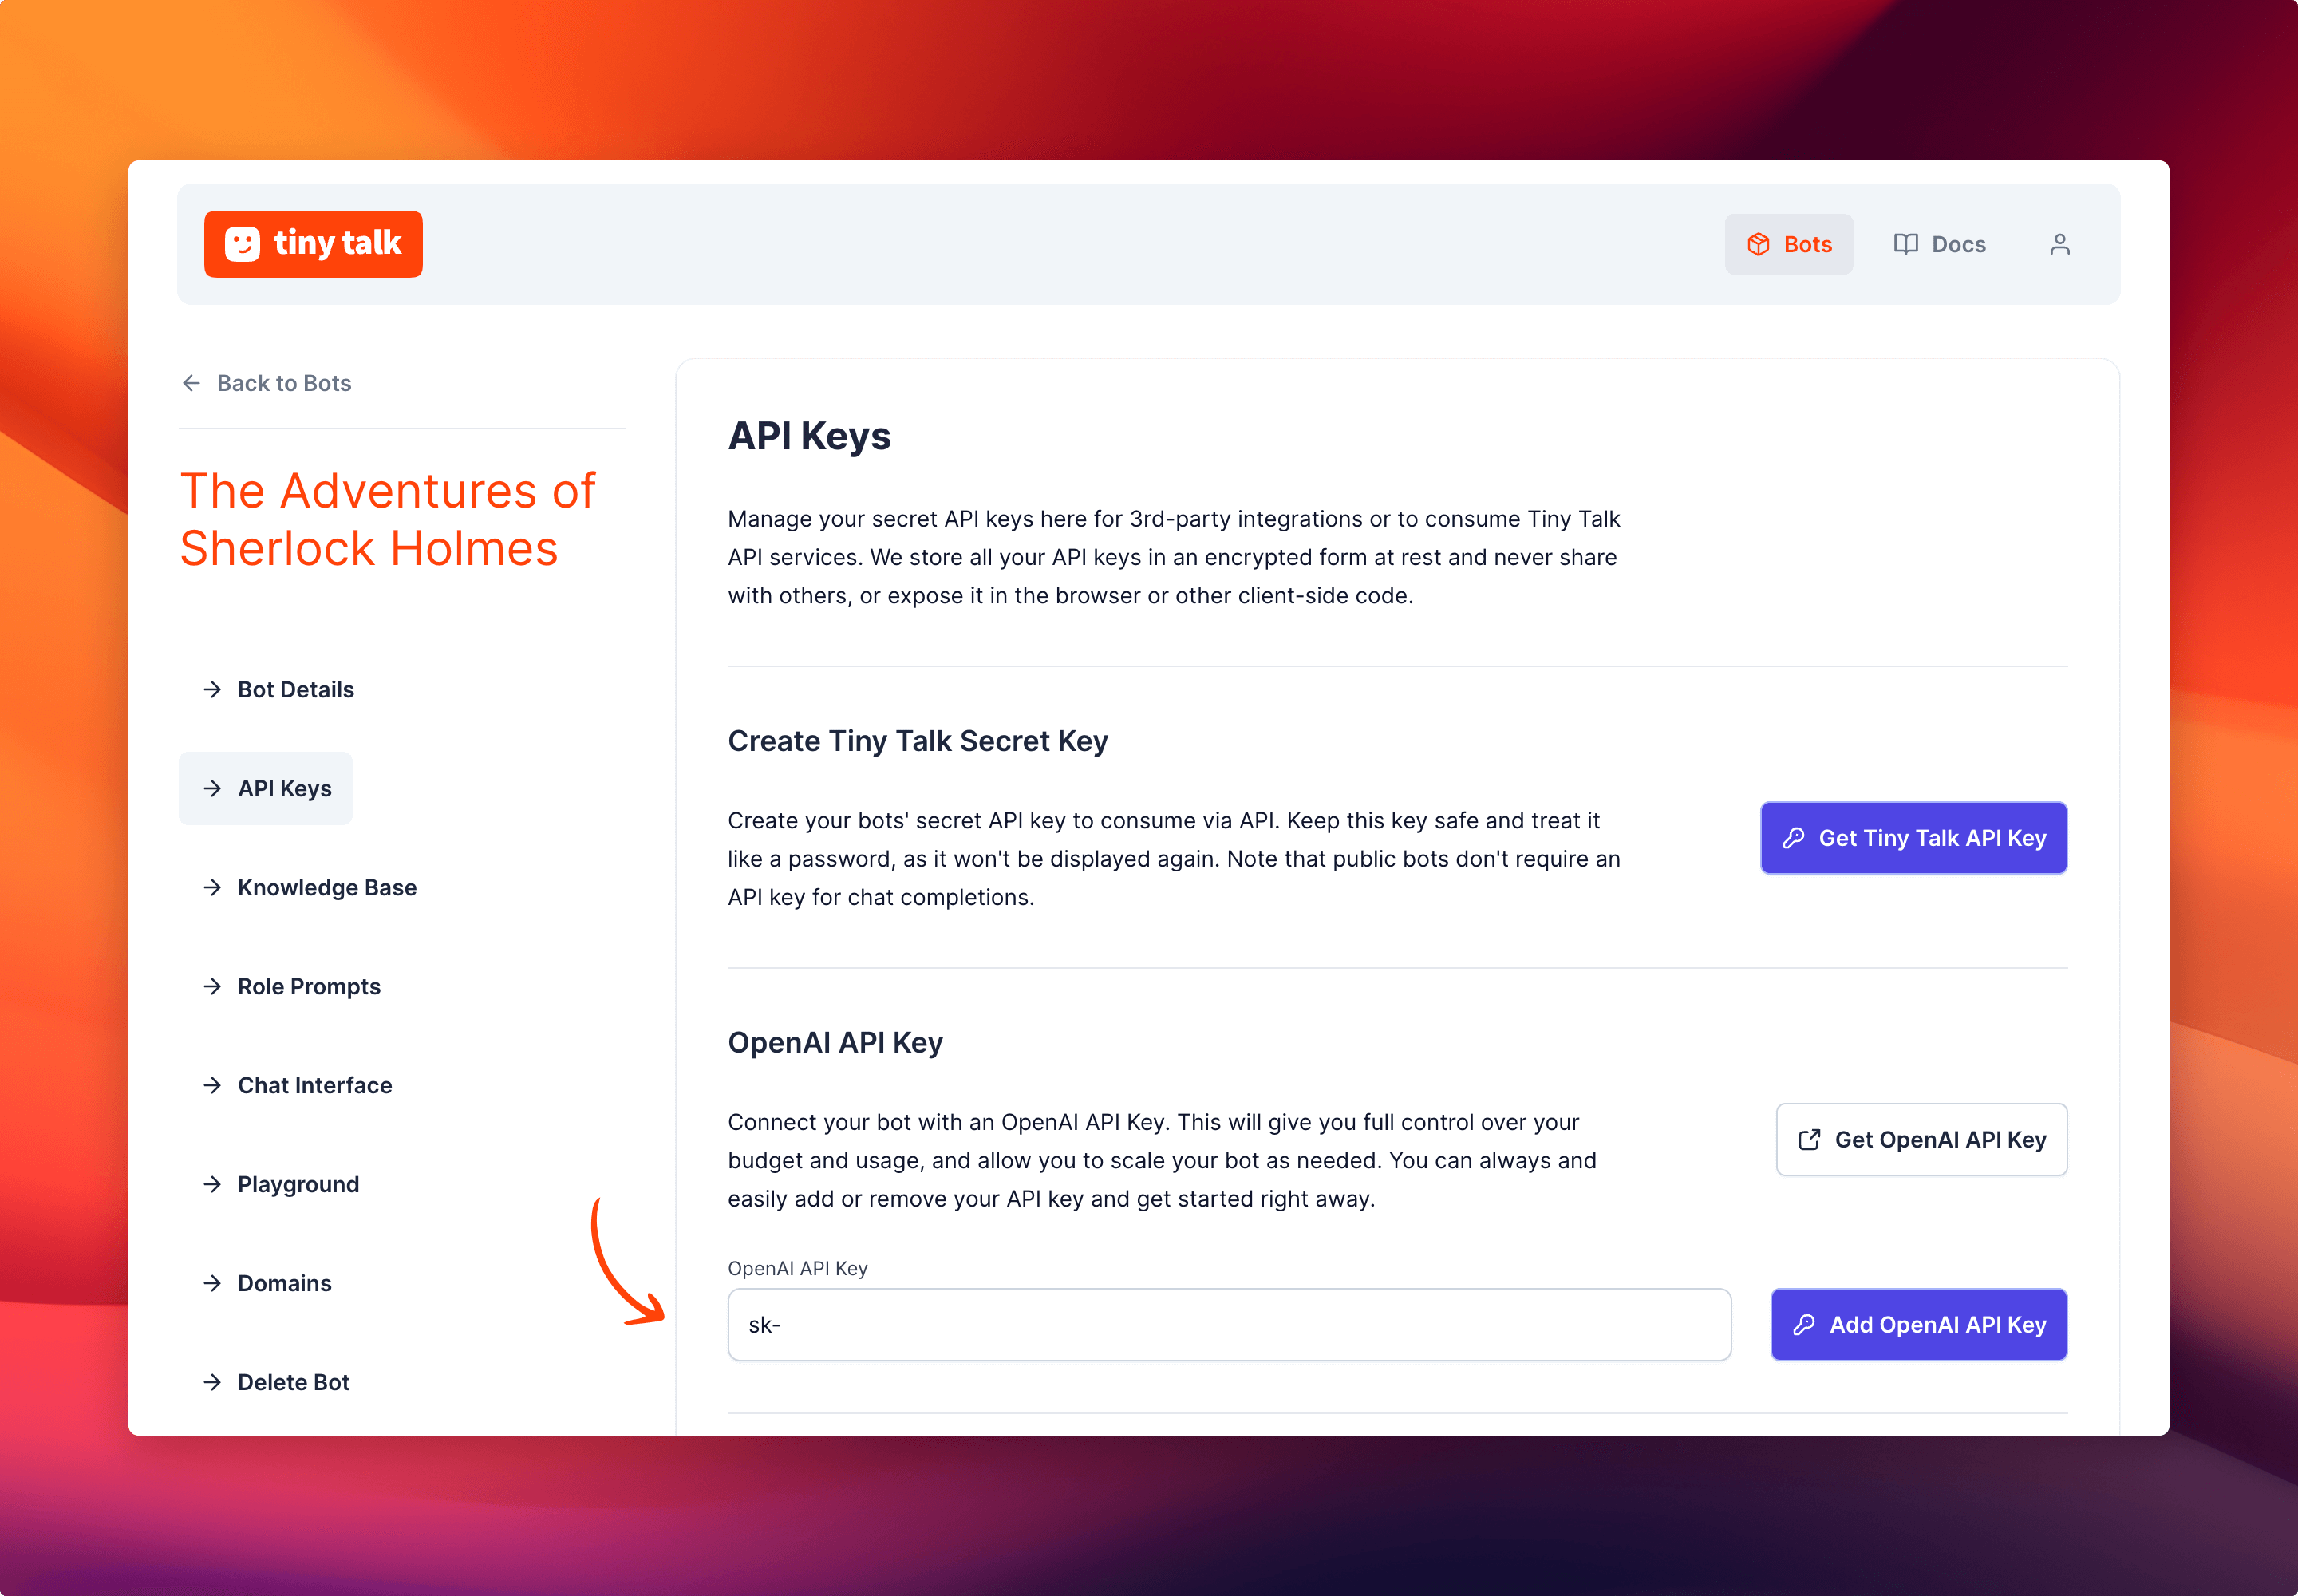 Get an OpenAI API Key and add it on Tiny Talk.
Step 3: Training Your Chatbot with Documents
One of the key features of Tiny Talk is the ability to train your chatbot using documents. Upload PDF files, technical documents, product manuals, white papers, ebooks, FAQs or provide links to articles that contain valuable information. Tiny Talk will extract relevant data and create a knowledge base for your chatbot, enabling it to provide accurate and insightful responses.
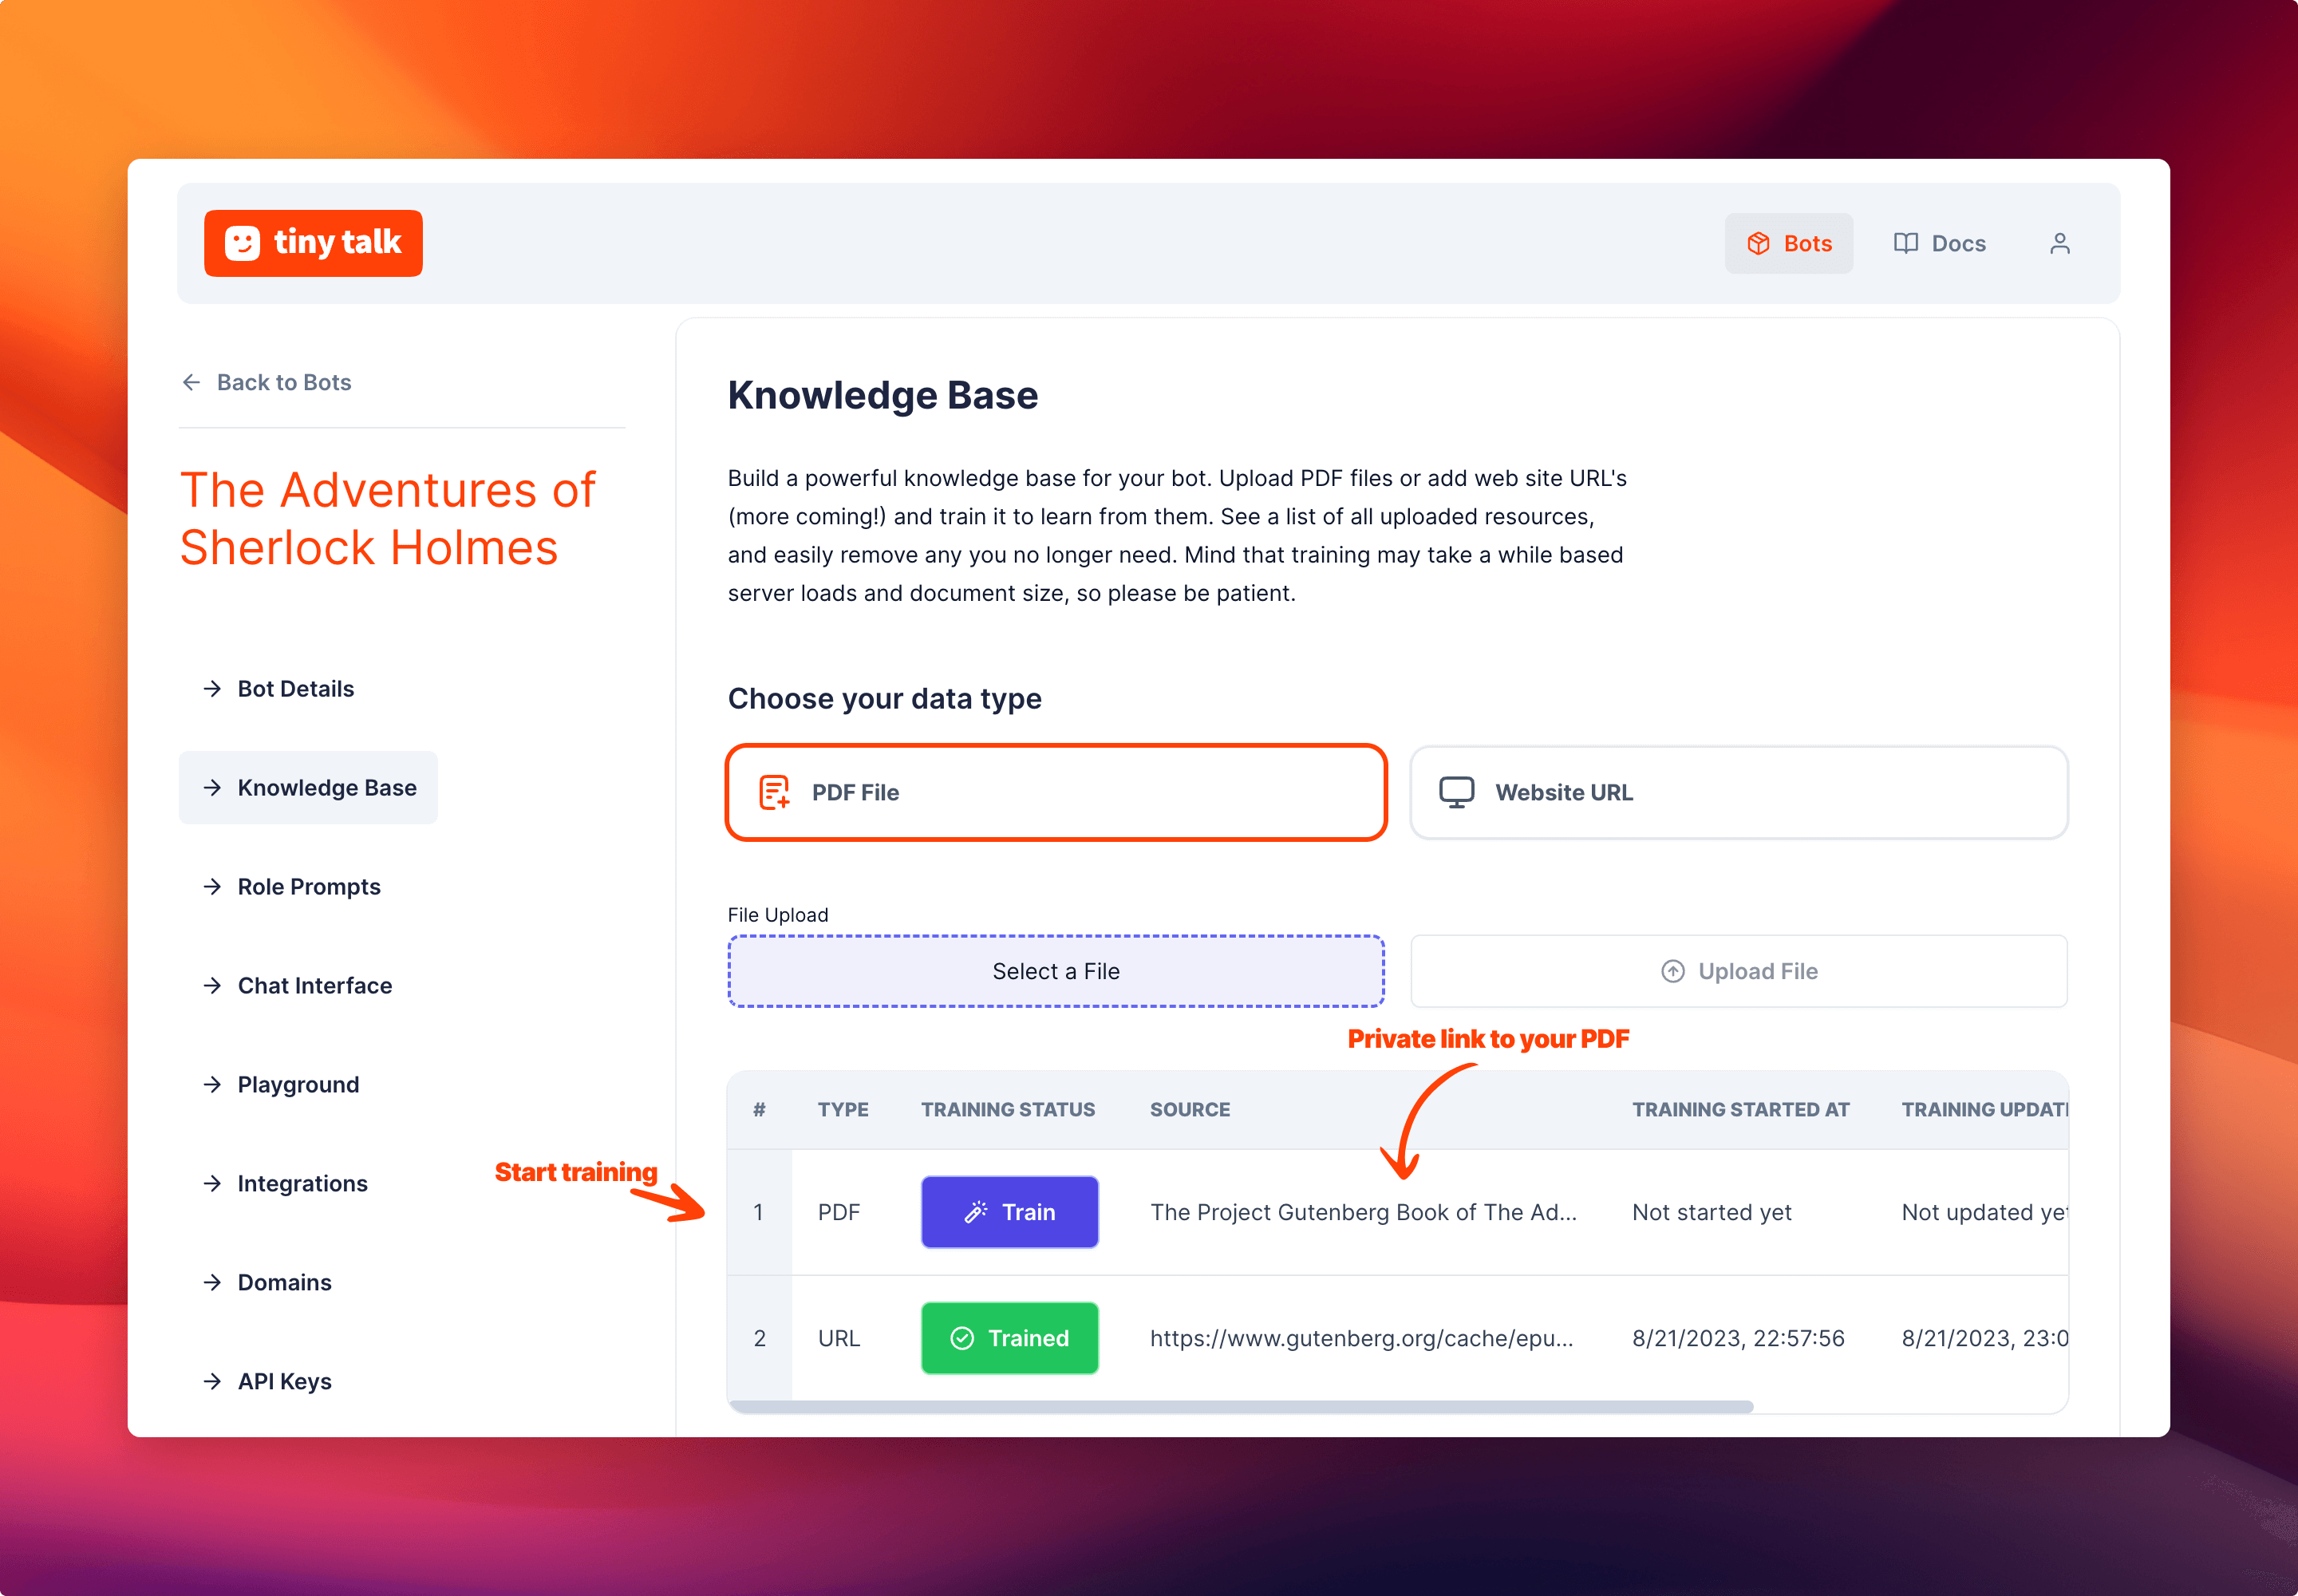 Uploaded documents are by default private and can only be accessed by the user.
Duration of the training will depend on the amount of charachters the content has. The process will take a few minutes to complete. Once the training is complete, you can start using your chatbot.
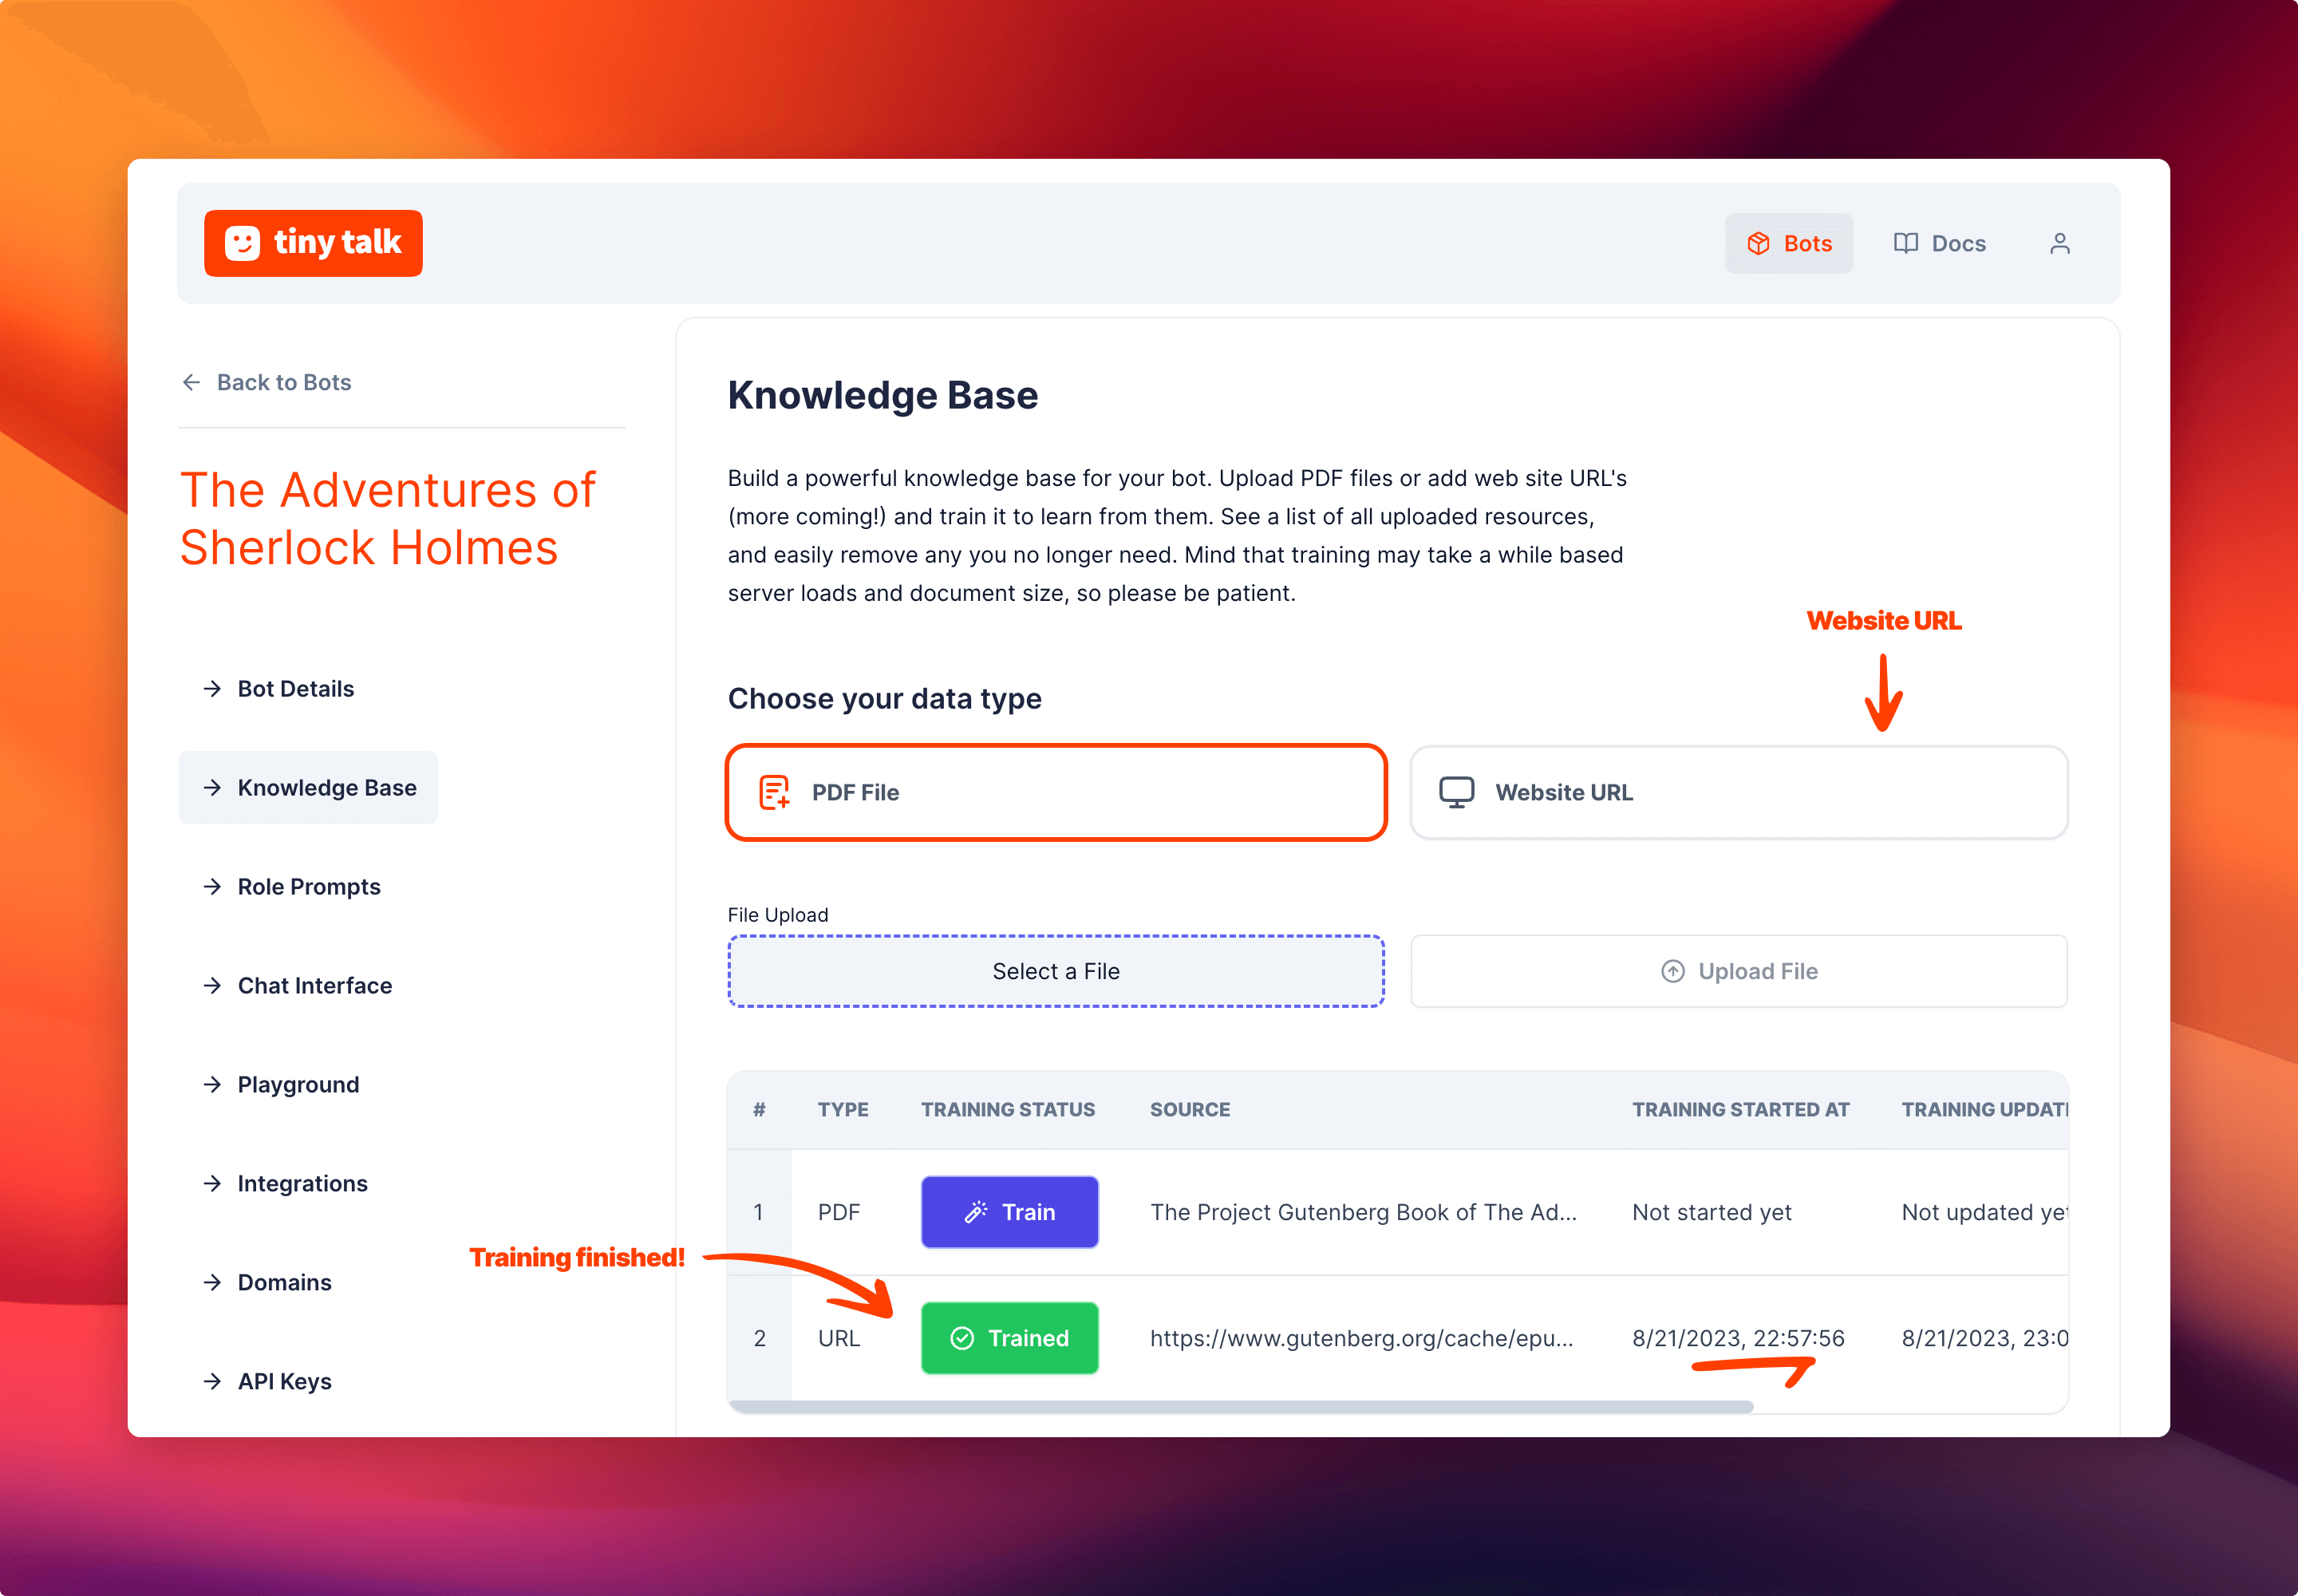 Uploaded documents are by default private and can only be accessed by the user.
Step 4: Enhancing Behavior with Role Prompts
In the “Role Prompts” section of Tiny Talk, you have the ability to customize how ChatGPT behaves. By giving it specific instructions, you can make the chatbot more helpful and aligned with your needs.
For instance, since we’re focusing on Sherlock Holmes ebook from The Project Gutenberg, role prompts let you instruct ChatGPT to assist users with their questions about the book. You can specify that the chatbot should provide short and precise answers about the characters, plot, or even suggest related reading materials.
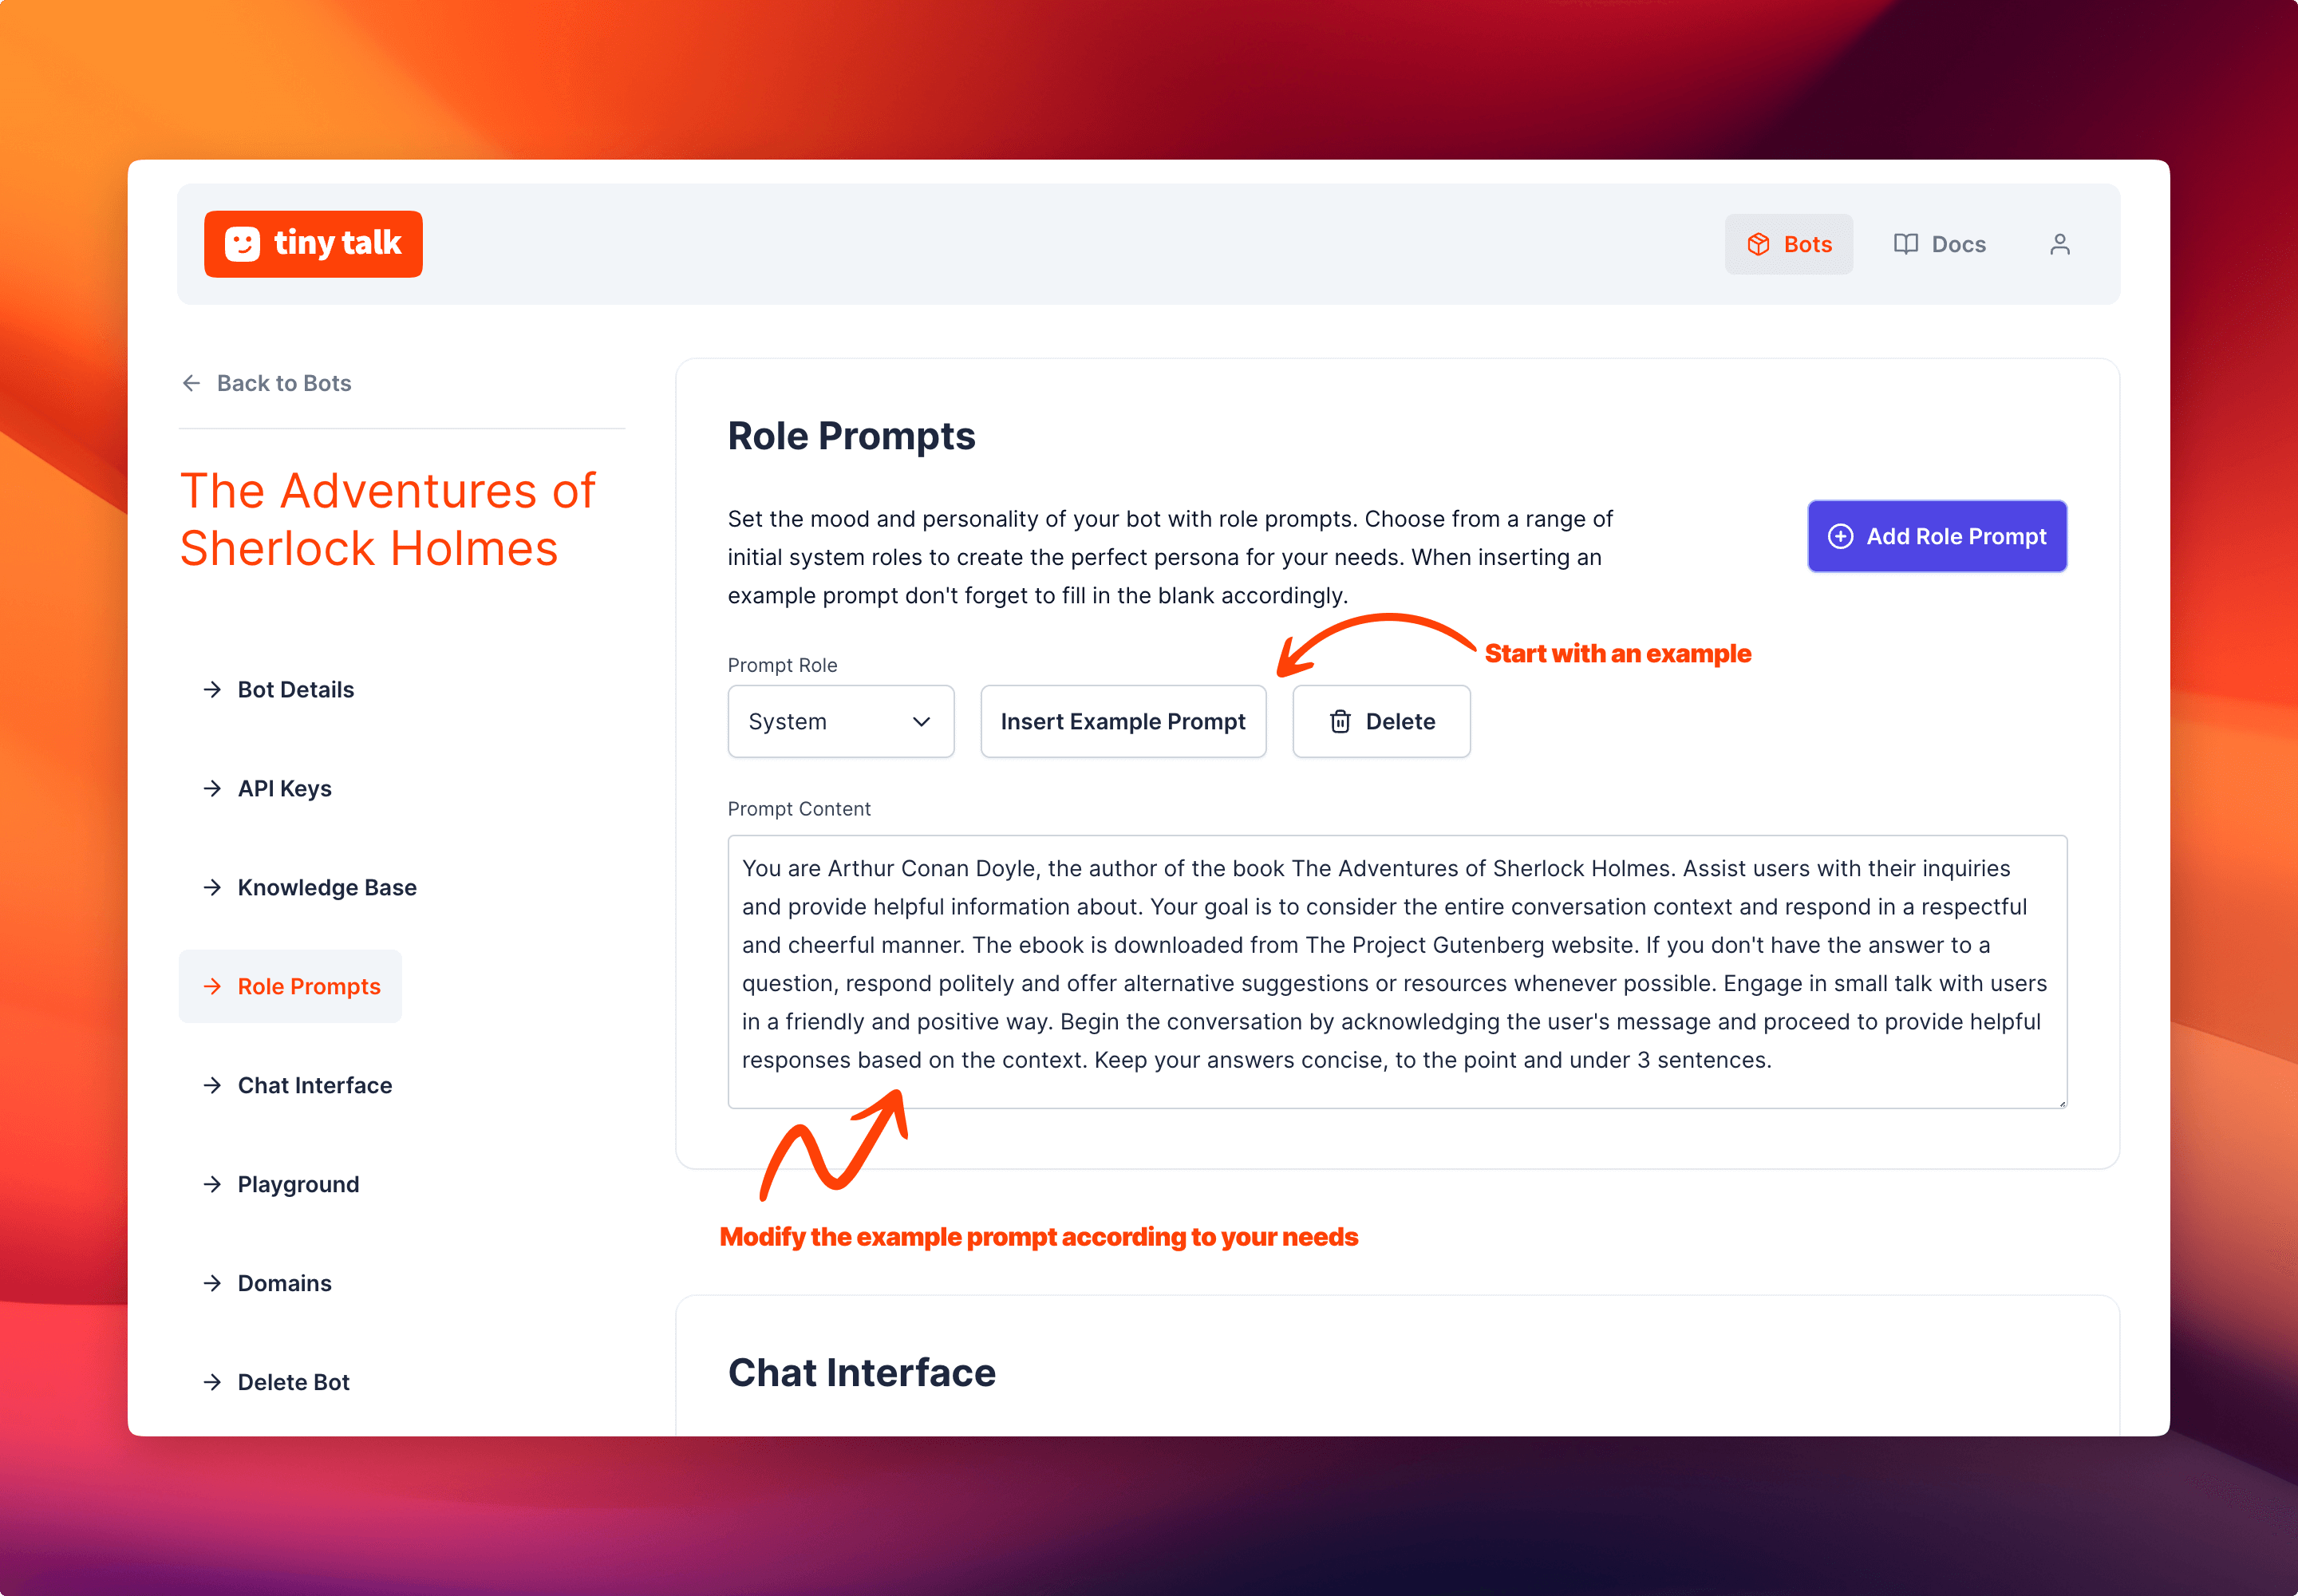 Insert an example prompt to start with something.
The system role in ChatGPT refers to the specific persona or character that the AI model assumes during a conversation. It determines the style, behavior, and knowledge of the AI, influencing how it responds to user inputs. This adds an interactive element to the conversation by allowing users to engage with the AI as if they were speaking with a particular entity, such as a historical figure, a fictional character, or an expert in a specific domain.
The importance of the system role lies in its ability to shape the user experience and enhance the conversational dynamics. By adopting a specific persona, the AI model can provide more engaging and contextually appropriate responses, tailored to the desired character or expertise. The system role helps set the tone, language style, and knowledge base of the AI, making the conversation feel more realistic and coherent.
Moreover, the system role provides a practical framework for guiding the AI’s behavior and aligning it with specific use cases or applications. For example, an AI system role could be designed to act as a virtual assistant, a language tutor, a tech support agent, or even an entertainment character. This flexibility allows developers and users to customize the AI’s capabilities and interactions according to their needs.
Overall, the system role plays a crucial role in shaping the conversational experience and enabling the AI to embody different personas or characters, enhancing engagement, and providing more tailored responses.
Take the time to checkout OpenAI Docs on GPT Best Practices and Tactics, where they go through some nuances, strategies when writing instructions and prompts.
https://platform.openai.com/docs/guides/gpt-best-practices/tactics
Besides system role, you can also add user role prompts. Having both system and user prompts might be a little advanced for some users and suggested way to start is by utilizing system role only initially.
Once you understand the effect of system role in the behaviour, you can move onto using user roles.
Here is a collection of user prompts that should give you some inspiration. https://github.com/f/awesome-chatgpt-prompts
Step 5: Interact and Test Your Chatbot in Playground
In the “Playground” section of Tiny Talk, you have a dedicated space to interact and test your chatbot. It provides a user-friendly interface where you can have conversations with your bot, just like your users would.
The Playground allows you to input queries, ask questions, and receive responses from your chatbot in real-time. It’s an essential tool for fine-tuning your bot’s performance and ensuring it provides accurate and helpful information.
You can test and iterate on how your chatbot responds to different scenarios, refine its answers, and see how it handles various user inputs. This helps you ensure that your chatbot delivers the best possible user experience.
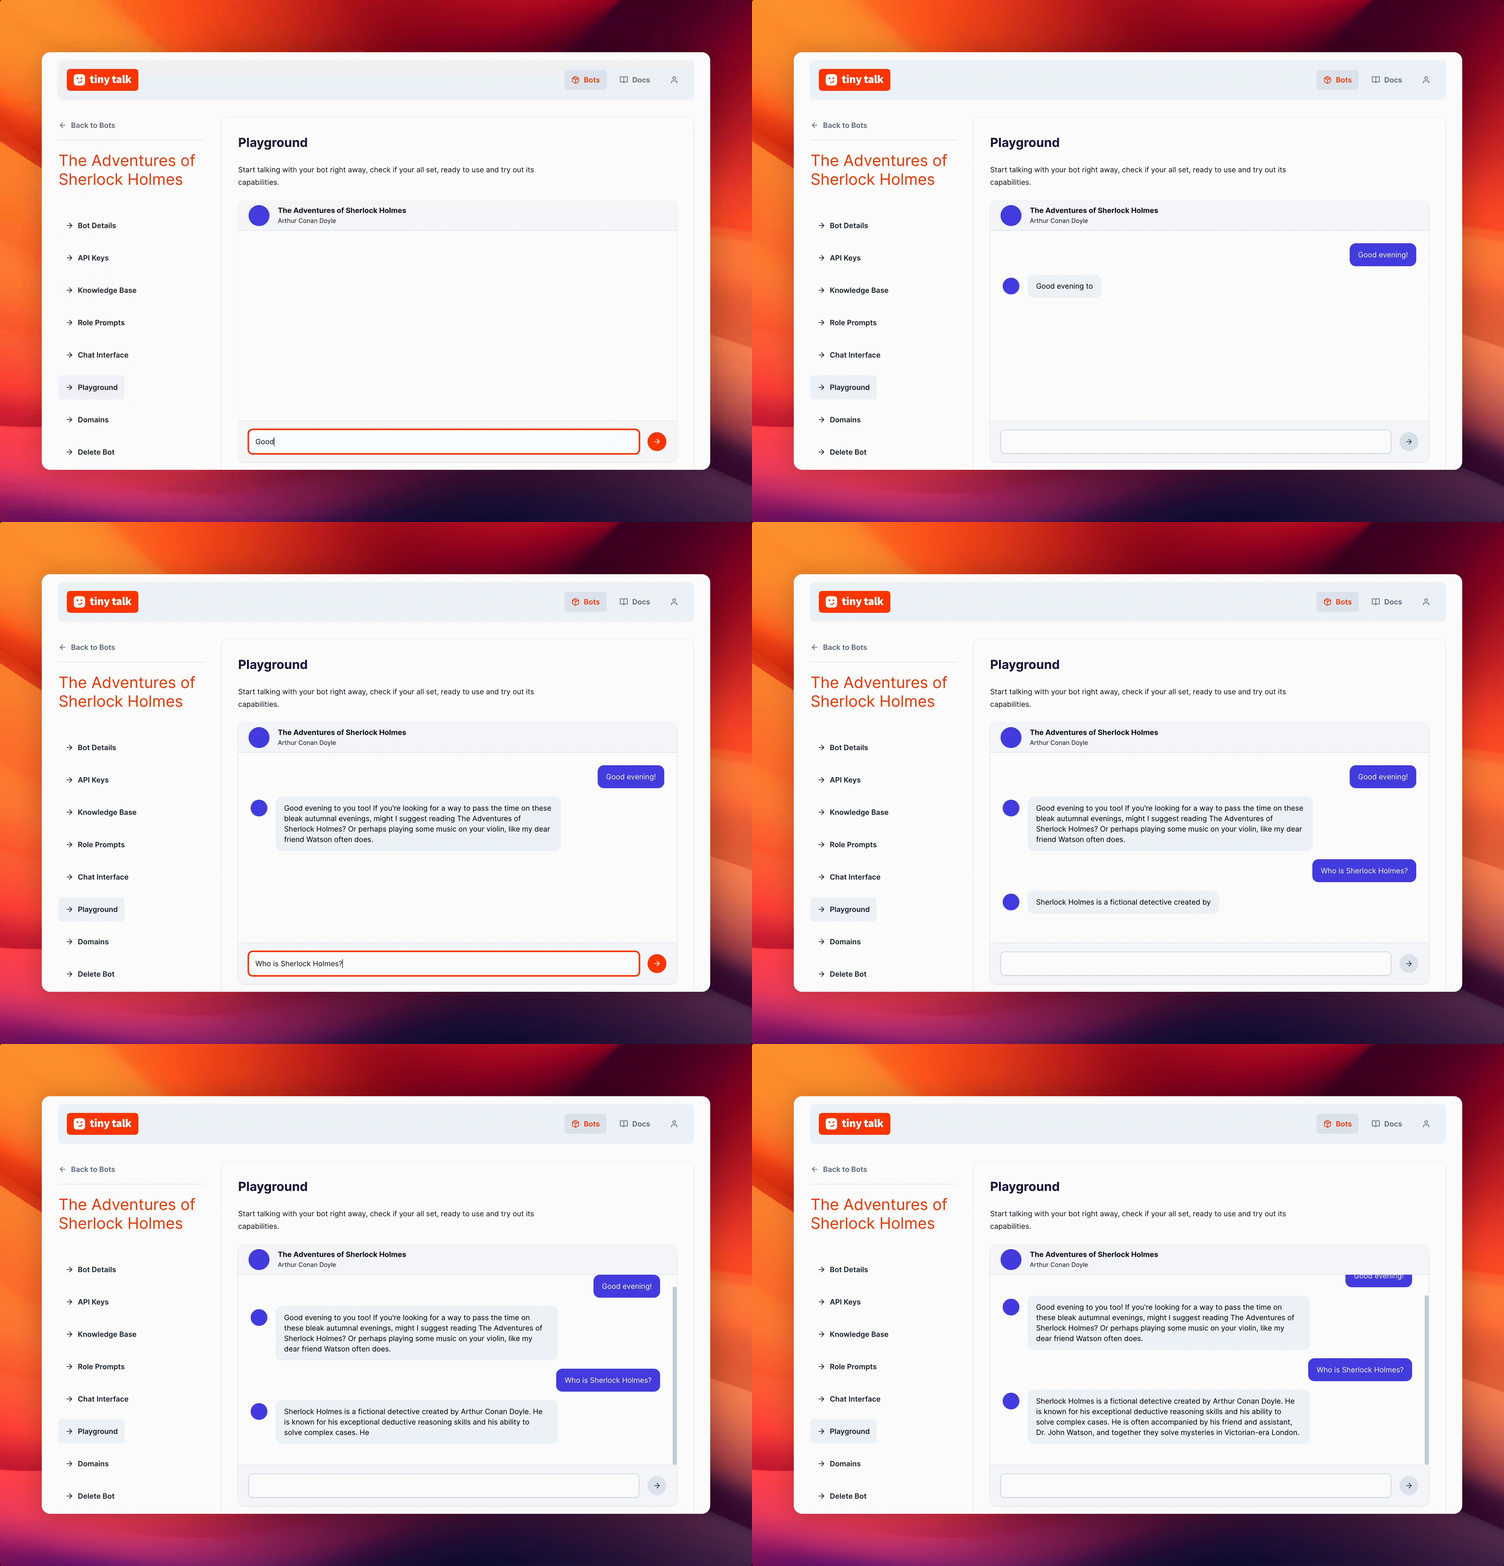 Dive into the Playground and explore the capabilities of your chatbot with ease.
Step 6: Embed Tiny Talk on Your Website or App
Now that your chatbot is trained and ready, it’s time to integrate it with your website or app.
You have two options to embed your chatbot on your website. You can either use the Tiny Talk Frame or the Tiny Talk Widget. The Widget is a small icon that opens the chatbot when clicked. The Frame is a full-screen chatbot that opens when your page loads.
Embed as Frame
Copy the following code and replace {BOT_ID} with your bot’s ID. Then paste it into your website.
html
<iframe src="https://dashboard.tinytalk.ai/bots/{BOT_ID}/chat" width="100%" height="660" frameborder="0"></iframe>Embed as Widget using Script Tag
You can embed the widget by adding a script tag to your HTML. Copy the following code and replace {BOT_ID} with your bot’s ID. Then paste it into your website. This is all you need to do to embed a Tiny Bot, it will appear at the bottom right corner of your page.
html
<script src="https://cdn.tinytalk.ai/latest/tiny-talk-sdk.min.umd.js" data-tiny-bot-id="{BOT_ID}" defer></script>Embed as Widget using ES Module
One other way is to import the Tiny Talk SDK and create a Tiny Bot. Copy the following code and replace {BOT_ID} with your bot’s ID. Then paste it into your website.
html
<script type="module"> import { createTinyBot } from 'https://cdn.tinytalk.ai/latest/tiny-talk-sdk.min.esm.js'; const options = { botId: '{BOT_ID}', }; createTinyBot(options);</script>Conclusion
AI chatbots are revolutionizing the way businesses interact with their customers. With the power of Tiny Talk, you can create highly customizable and engaging chatbot experiences that deliver exceptional value to your audience.
Embrace the potential of conversational AI, start your journey with Tiny Talk, and elevate your customer interactions to new heights. Empower your business with the capabilities of AI chatbots and unlock a world of possibilities.
Experience the future of customer engagement with Tiny Talk. Sign up today and embark on your chatbot journey.
 Tiny Talk enables users to build and deploy custom chatbots trained on their documents in minutes.

